آموزش جاوا اسکریپت پروژه محور | ۱۵ پروژه عملی و کاربردی

۹۲۴ بازدید
آخرین به‌روزرسانی: ۷ شهریور ۱۴۰۲
زمان مطالعه: ۵۶ دقیقه
آموزش پروژه محور جاوا اسکریپت

جاوا اسکریپت یک زبان سبک و تفسیری برنامه‌نویسی است که برای ایجاد اپلیکیشن‌های مبتنی بر اینترنت طراحی شده است. پیاده‌سازی جاوا اسکریپت بسیار آسان است، ‌زیرا با HTML ادغام شده است. جاوا اسکریپت یک زبان باز و چند پلتفرمی است. در این مقاله به معرفی این زبان و ارائه آموزش جاوا اسکریپت پروژه محور خواهیم پرداخت.

فهرست مطالب این نوشته

چرا باید جاوا اسکریپت یاد بگیریم؟

جاوا اسکریپت یک زبان ضروری برای دانشجویان و شاغلان حرفه‌ای در مسیر تبدیل شدن به یک مهندس ‌‌نرم‌افزار به خصوص در زمان کار در حوزه توسعه وب محسوب می‌شود. در این بخش برخی از آموزش جاوا اسکریپت پروژه محور مزیت‌های کلیدی یادگیری جاوا اسکریپت را توضیح می‌دهیم:

جاوا اسکریپت رایج‌ترین زبان برنامه‌نویسی در دنیا است و به همین جهت به یک گزینه عالی برای برنامه‌نویس‌ها تبدیل شده است. زمانی که جاوا اسکریپت را بیاموزید، به شما کمک می‌کند که فرانت‌اند‌های عالی را طراحی کنید و با استفاده از فریمورک‌های مختلف مبتنی بر جاوا اسکریپت مانند jQuery ،Node.JS و غیره، نرم‌افزارهای بک‌اند را طراحی کنید.

جاوا اسکریپت همه جا حضور دارد و روی همه مرورگرهای مدرن وب از قبل نصب شده است. از این رو برای نوشتن کدهای جاوا اسکریپت عملاً به هیچ چیز نیاز ندارید. مرورگرهای مختلف شامل کروم، فایرفاکس، سافاری و هر مرورگر دیگر که امروزه می‌شناسیم از جاوا اسکریپت پشتیبانی می‌کند.

آموزش جاوا اسکریپت پروژه محور

آموزش کدنویسی با جاوا اسکریپت

جاوا اسکریپت به ایجاد وب‌سایت‌های واقعاً زیبا و کاملاً سریع کمک می‌کند. بدین ترتیب می‌توانید وب‌سایت خود را با یک کنسول توسعه دهید، ‌طوری که حس و ظاهر آن بهترین تجربه کاربری گرافیکی را در اختیار کاربر قرار دهد. کاربرد جاوا اسکریپت اینک به توسعه اپلیکیشن‌های موبایل، توسعه اپلیکیشن‌های دسکتاپ و توسعه بازی نیز گسترش یافته است. بدین ترتیب فرصت‌های زیادی در پیش روی برنامه‌نویس جاوا اسکریپت قرار می‌گیرد.

به دلیل تقاضای بالایی که برای جاوا اسکریپت وجود دارد، رشد شغلی بالا و پرداخت حقوقی زیادی برای افرادی که با جاوا اسکریپت برنامه‌نویسی می‌کنند وجود دارد. شما می‌توانید به سایت‌های شغل‌یابی مختلف بروید تا مهارت‌های جاوا اسکریپت مختلفی را که در بازار کار مورد نیاز هستند، ببینید. نکته عالی در مورد جاوا اسکریپت این است که هزاران فریمورک و کتابخانه مختلف وجود دارند که می‌توان مستقیماً در توسعه نرم‌افزار برای کاهش زمان ارائه به بازار مورد استفاده قرار داد.

برای یادگیری زبان برنامه‌نویسی دلایل بسیار زیادی وجود دارند، اما نکته‌ای که باید مطمئن باشیم این است که برای یادگیری هر نوع زبان برنامه‌نویسی، نه فقط جاوا اسکریپت، تنها لازم است که به تمرین کدنویسی بپردازید تا به یک فرد متبحر تبدیل شوید.

برنامه Hello World با استفاده از جاوا اسکریپت

در نخستین گام از آموزش جاوا اسکریپت پروژه محور برای اینکه اندکی آشنایی عملی با این زبان برنامه نویسی پیدا کنید، یک برنامه آزمایشی کوچک Hello World می‌نویسیم:

<html>
   <body>   
      <script language = "javascript" type = "text/javascript">
         <!--
            document.write("Hello World!")
         //-->
      </script>      
   </body>
</html>

فریمورک‌ها و کتابخانه‌های مختلف و زیادی برای جاوا اسکریپت وجود دارند:

  • Angular
  • React
  • jQuery
  • Vue.js
  • Ext.js
  • Ember.js
  • Meteor
  • Mithril
  • Node.js
  • Polymer
  • Aurelia
  • Backbone.js

ارائه لیست کاملی از همه فریمورک‌ها و کتابخانه‌های جاوا اسکریپت مقدور نیست، زیرا دنیای جاوا اسکریپت بسیار بزرگ است و هر روز اتفاقات جدید زیادی در آن رخ می‌دهند.

کاربردهای برنامه‌نویسی جاوا اسکریپت

همچنان که پیش‌تر توضیح دادیم، جاوا اسکریپت یکی از پراستفاده‌ترین زبان‌های برنامه‌نویسی دنیا چه در حوزه فرانت‌اند و چه بک‌اند است. این زبان تقریباً در همه زمینه‌های توسعه نرم‌افزار حضور دارد. در ادامه آموزش جاوا اسکریپت پروژه محور برخی از این موارد را فهرست‌بندی کرده‌ایم.

  • اعتبارسنجی سمت کلاینت: اعتبارسنجی سمت کلاینت برای تأیید همه ورودی‌های کاربر، پیش از تحویل به سرور کمکی زیادی می‌کند و در این مسیر جاوا اسکریپت نقش مهمی در اعتبارسنجی ورودی‌های کاربر در همان سمت فرانت‌اند ایفا می‌کند.
  • دست‌کاری صفحات HTML: جاوا اسکریپت به دست‌کاری صفحه‌های HTML به صورت درجا کمک می‌کند. به این ترتیب می‌توان تگ‌های ‌HTML را به روشی بسیار ساده با استفاده از جاوا اسکریپت حذف یا اضافه کرد و همچنین فایل HTML را مورد ویرایش قرار داد تا حس و ظاهر آن بر مبنای دستگا‌ه‌ها و شرایط مختلف تغییر یابد.
  • نوتیفکیشن‌های کاربر: شما می‌توانید از جاوا اسکریپت برای باز کردن پاپ‌آپ‌های دینامیک روی صفحه‌های وب و ارائه انواع مختلفی از نوتیفکیشن‌ها به بازدیدکنندگان وب‌سایت استفاده کنید.
  • بارگذاری داده‌ها در بک‌اند: جاوا اسکریپت کتابخانه Ajax را ارائه کرده است که به بارگذاری داده‌ها از بک‌اند در زمان اجرای برخی پردازش‌های دیگر کمک می‌کند. به این ترتیب تجربه شگفت‌انگیزی برای بازدیدکنندگان وب‌سایت خلق می‌شود.
  • ارائه: جاوا اسکریپت یک امکان برای ایجاد ارائه نیز فراهم ساخته است که روی حس و ظاهر وب‌سایت تأثیر می‌گذارد. به این منظور کتابخانه‌های RevealJS و BespokeJS برای ساخت ارائه‌های مبتنی بر وب ارائه شده‌اند.
  • اپلیکیشن‌های سرور: NodeJS بر مبنای محیط زمان اجری جاوا اسکریپت در کروم برای ایجاد اپلیکیشن‌های سریع و مقیاس‌پذیر سرور ساخته شده است. این یک کتابخانه مبتنی بر رویداد است که به توسعه بسیاری از اپلیکیشن‌های پیچیده سمت سرور به همراه وب‌سرورها کمک می‌کند.

این لیست همچنان ادامه دارد و زمینه‌های مختلفی وجود دارند که میلیون‌ها توسعه‌دهنده نرم‌افزار در آن‌ها از جاوا اسکریپت برای توسعه وب‌سایت‌ها و دیگر نرم‌افزارهای عالی بهره می‌گیرند.

مطلب آموزش جاوا اسکریپت پروژه محور برای افراد مبتدی نگارش یافته است تا با مبانی مقدماتی زبان برنامه‌نویسی جاوا اسکریپت و روش طراحی صفحه‌های وب دینامیک آشنا شوید، اما برای مطالعه این راهنما و اجرای کد‌های آن می‌بایست دست‌کم دانشی مقدماتی از HTML داشته باشید. همچنین در صورتی که دانش اندکی در مورد برنامه‌نویسی شیءگرا و ایده‌ای کلی در مورد اپلیکیشن‌های آنلاین داشته باشید، کمک بزرگی خواهد بود.

جاوا اسکریپت چیست؟

جاوا اسکریپت چیست

جاوا اسکریپت یک زبان برنامه‌نویسی دینامیک است. این زبان سبک و پرکاربرد به عنوان بخشی از صفحه‌های وب استفاده می‌شود و پیاده‌سازی آن در اسکریپت‌های سمت کلاینت موجب می‌شود که امکان تعامل با کاربر و دینامیک ساختن صفحه‌های وب فراهم آید. جاوا اسکریپت یک زبان برنامه‌نویسی تفسیرشونده با ظرفیت‌های شیءگرایی است.

جاوا اسکریپت در ابتدا به نام LiveScript شناخته می‌شد، اما در ادامه شرکت Netscape نام آن را به JavaScript تغییر داد. دلیل احتمالی این تغییر نام، وجود هیجان زیادی است که در آن زمان با معرفی زبان جدیداً مطرح‌شده جاوا پدید آمده بود. جاوا اسکریپت نخستین بار در مرورگر نت‌اسکیپ 2.0 در سال 1995 با نام LiveScript ظاهر شد. هسته چندمنظوره این زبان در نت‌اسکیپ، اینترنت اکسپلورر و دیگر مرورگرهای وب قرار گرفت. در ادامه مشخصات ECMA-262 یک نسخه استاندارد برای هسته زبان جاوا اسکریپت زیر تعریف کرد.

  • جاوا اسکریپت یک زبان برنامه‌نویسی سبک و تفسیرشونده است.
  • این زبان برای طراحی اپلیکیشن‌های آنلاین طراحی شده است.
  • مکمل جاوا بوده و در آن ادغام می‌شود.
  • مکمل HTML بوده و در آن ادغام می‌شود.
  • جاوا اسکریپت یک زبان باز و چند پلتفرمی است.

جاوا اسکریپت سمت کلاینت

جاوا اسکریپت سمت کلاینت رایج‌ترین زبان برنامه‌نویسی دنیا محسوب می‌شود. این اسکریپت‌ها را می‌توان در یک سند HTML قرار داده یا ارجاعاتی به آن‌ها داد تا از سوی مرورگر تفسیر شوند.

این بدان معنی است که لزومی ندارد یک صفحه وب به صورت استاتیک باشد، بلکه می‌تواند شامل برنامه‌ای باشد که با کاربر تعامل پیدا می‌کند، مرورگر را کنترل کرده و به صورت دینامیکی محتوای HTML را ایجاد می‌کند.

مکانیسم سمت کلاینت جاوا اسکریپت مزیت‌های زیادی نسبت به اسکریپت‌های CGI سمت سرور سنتی ارائه می‌کند. برای نمونه می‌توانید از جاوا اسکریپت برای بررسی معتبر بودن ایمیل وارد شده از سوی کاربر استفاده کنید.

کد جاوا اسکریپت زمانی که کاربر فرم را تحویل می‌دهد، اجرا شده و تنها در صورتی که همه مدخل‌های ورودی معتبر باشند، آن را تحویل وب‌سرور می‌دهد. از جاوا اسکریپت می‌توان برای به دام انداختن رویدادهای آغازشده از سوی کاربر مانند کلیک کردن دکمه‌ها، ناوبری بین لینک‌ها و دیگر اقداماتی که کاربر به صورت صریح یا ضمنی در مرورگر انجام می‌دهد بهره گرفت.

مزایای جاوا اسکریپت

مزیت‌های استفاده از جاوا اسکریپت به شرح زیر هستند:

  • تعامل کمتر با سرور: با استفاده از جاوا اسکریپت، می‌توان ورودی‌‌های کاربر را پیش از ارسال فرم به سرور اعتبارسنجی کنید. به این ترتیب در ترافیک شبکه صرفه‌جویی می‌‌شود، یعنی بار کمتری به سرور وارد می‌شود.
  • بازخورد آنی به بازدیدکنندگان:  با استفاده از جاوا اسکریپت دیگر لازم نیست بازدیدکنندگان منتظر بمانند تا یک صفحه بارگذاری مجدد شود تا ببینند آیا وارد کردن چیزی را فراموش کرده‌اند یا نه.
  • افزایش تعامل‌پذیری: امکان ایجاد تعامل در اینترفیس‌ها پدید می‌آید. به این ترتیب وقتی کاربر ماوس را روی آن‌ها می‌برد و یا آن‌ها را از طریق کیبورد فعال می‌کند، واکنش نشان می‌دهند.
  • اینترفیس‌های غنی‌تر: می‌توان از جاوا اسکریپت برای گنجاندن آیتم‌ها به صورت اجزای کشیدنی و رها کردنی و اسلایدرها برای طراحی اینترفیس کاربری غنی استفاده کرد.

محدودیت‌های جاوا اسکریپت

جاوا اسکریپت را نمی‌توان یک زبان برنامه‌نویسی با امکانات کامل دانست. دلیل این مسئله آن است که این زبان برخی محدودیت‌های خاص خود را دارد:

  • جاوا اسکریپت سمت کلاینت مجاز به خواندن و نوشتن فایل‌ها نیست. این مسئله به دلیل امنیتی منع شده است.
  • از جاوا اسکریپت نمی‌توان برای اپلیکیشن‌های شبکه استفاده کرد، زیرا از چنین قابلیتی پشتیبانی نمی‌کند.
  • جاوا اسکریپت از قابلیت‌های چندنخی و یا چندپردازنده‌ای پشتیبانی نمی‌کند.

یک بار دیگر در این آموزش جاوا اسکریپت پروژه محور باید اشاره کنیم که جاوا اسکریپت یک زبان برنامه‌نویسی سبُکِ تفسیرشونده است که امکان ایجاد تعامل را در صفحه‌های استاتیک HTML فراهم می‌سازد.

ابزارهای توسعه جاوا اسکریپت

ابزارهای توسعه جاوا اسکریپت

یکی از مزیت‌های اصلی جاوا اسکریپت این است که به ابزارهای گران‌قیمت برای کدنویسی نیاز ندارد. شما می‌توانید کار خود را با یک ادیتور متنی ساده مانند Notepad آغاز کنید. از آنجا که این یک زبان تفسیرشونده در چارچوب یک مرورگر وب است، حتی نیازی به خرید یک کامپایلر هم ندارید.

ساختار جاوا اسکریپت

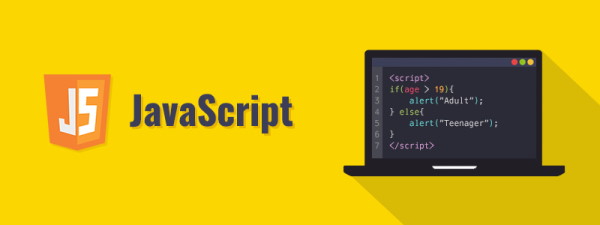
اجازه بدهید پیش از آنکه وارد مباحث اصلی آموزش جاوا اسکریپت پروژه محور بشویم، قدری ساختارها را یادآوری کنیم. زبان جاوا اسکریپت می‌تواند با استفاده از گزاره‌های جاوا اسکریپت که درون تگ‌های <script>... </script> در صفحه وب با ساختار HTML قرار می‌گیرند، ‌پیاده‌سازی شود. امکان قرار دادن تگ‌های <script> شامل کد جاوا اسکریپت در هر جایی درون صفحه وب وجود دارد، اما به طور معمول توصیه می‌شود که این تگ‌ها درون تگ <head> قرار گیرند.

تگ <script> به برنامه مرورگر اعلام می‌کند که همه متن بین این تگ‌ها را به عنوان یک اسکریپت تفسیر کند. یک ساختار ساده کد جاوا اسکریپت به صورت زیر است:

<script ...>
   JavaScript code
</script>

این تگ اسکریپت دو خصوصیت مهم می‌گیرد:

  • Language – این خصوصیت زبانی که برای اسکریپت‌نویسی استفاده شده است را مشخص می‌سازد. به طور معمول این مقدار javascript است. با این که نسخه‌های جدید HTML (و XHTML و نسخه‌های قبلی آن) استفاده از این خصوصیت را کنار گذاشته‌اند.
  • Type – این خصوصیت برای تعیین زبان اسکریپت‌نویسی مورد استفاده مورد تأکید قرار گرفته است و مقدار آن باید text/javascript باشد.

بنابراین قطعه جاوا اسکریپت باید مانند زیر باشد:

<script language = "javascript" type = "text/javascript">
   JavaScript code
</script>

نخستین کد جاوا اسکریپت

در این بخش از آموزش پروژه محور جاو اسکریپت برنامه کوچک Hello World که قبلاً نوشتیم را با هم بررسی می‌کنیم. ابتدا یک کامنت اختصاری HTML اضافه می‌کنیم که کد جاوا اسکریپت را در بر می‌گیرد. این کامنت با علامت <--//‎ پایان می‌یابد. در اینجا منظور از // این است که یک کامنت جاوا اسکریپت است و از این رو باید اضافه شود تا انتهای اسکریپت به عنوان یک کد از سوی مرورگر تفسیر نشود. سپس یک تابع به نام document.write می‌نویسیم که یک رشته را در سند HTML می‌نویسد. از این تابع برای نوشتن متن، HTML یا هر دو استفاده می‌کنیم. به کد زیر نگاه کنید:

<html>
   <body>   
      <script language = "javascript" type = "text/javascript">
         <!--
            document.write("Hello World!")
         //-->
      </script>      
   </body>
</html>

این کد خروجی زیر را تولید می‌کند:

Hello World!

فاصله خالی و شکستن خطوط در جاوا اسکریپت

جاوا اسکریپت فاصله‌های خالی، علامت tab و newline را که در برنامه‌های جاوا اسکریپت ظاهر شوند، نادیده می‌گیرد و خطوط جدید را می‌توان آزادانه در برنامه استفاده کرد و کد را به صورت دلخواه دندانه‌گذاری و قالب‌بندی کرد. البته این کار باید به روشی منسجم و روشن انجام یابد تا خواندن و درک کد آسان شود.

نقطه‌ویرگول‌ها در جاوا اسکریپت اختیاری هستند

در ادامه از آموزش جاوا اسکریپت پروژه محور لازم است یادآور شویم، به طور معمول گزاره‌های ساده در جاوا اسکریپت به یک کاراکتر نقطه‌ویرگول (;) ختم می‌شوند که این وضعیت شبیه زبان‌های ++C ‎،C و جاوا است. با این حال جاوا اسکریپت اجازه حذف نقطه‌ویرگول را در صورت درج گزاره‌های مختلف در خطوط جدید فراهم می‌سازد. برای نمونه کد زیر را می‌توان بدون نقطه‌ویرگول نیز نوشت:

<script language = "javascript" type = "text/javascript">
   <!--
      var1 = 10
      var2 = 20
   //-->
</script>

اما زمانی که آن را در یک خط قالب‌بندی کنیم، باید از نقطه‌ویرگول استفاده کنیم:

<script language = "javascript" type = "text/javascript">
   <!--
      var1 = 10; var2 = 20;
   //-->
</script>

نکته: استفاده از نقطه‌ویرگول یک رویه خوب برنامه‌نویسی محسوب می‌شود.

حساسیت جاوا اسکریپت به کوچکی/بزرگی حروف

جاوا اسکریپت یک زبان است که در آن کوچکی/بزرگی حروف مهم است. این بدان معنی است که کلیدواژه‌های این زبان، متغیرها، ‌نام توابع و دیگر شناسه‌ها باید همواره با یک نوع خاص از کوچکی/بزرگی حروف نوشته شوند.

بنابراین شناسه‌های Time و TIME از نظر جاوا اسکریپت معانی متفاوتی دارند.

نکته: در زمان نوشتن متغیرها و نام توابع در جاوا اسکریپت باید دقت ویژه‌ای به این مسئله مبذول شود.

کامنت ها در جاوا اسکریپت

جاوا اسکریپت از هر دو نوع کامنت به سبک زبان C و به سبک زبان ++C پشتیبانی می‌کند. بدین ترتیب:

  • هر متن بین // و انتهای یک خط به عنوان یک کامنت تلقی شده و از سوی جاوا اسکریپت نادیده گرفته می‌شود.
  • هر متن بین کاراکترهای /* و */ به عنوان یک کامنت نگریسته می‌شود. این نوع کامنت را می‌توان در چند خط نوشت.
  • جاوا اسکریپت همچنین کاراکتر باز کردن کامنت‌های HTML یعنی —!> را شناسایی می‌کند و با آن همچون علامت // مانند یک کامنت تک‌خطی رفتار می‌کند.
  • علامت بستن کامنت‌های HTML یعنی <-- از سوی جاوا اسکریپت شناسایی نمی‌شود و از این رو باید به صورت <---// نوشته شود.

مثالی از کامنت در جاوا اسکریپت

مثال زیر شیوه استفاده از کامنت در جاوا اسکریپت را نشان می‌دهد:

<script language = "javascript" type = "text/javascript">
   <!--
      // This is a comment. It is similar to comments in C++
   
      /*
      * This is a multi-line comment in JavaScript
      * It is very similar to comments in C Programming
      */
   //-->
</script>

منظور از جاوا اسکریپت ساده چیست؟

جاوا اسکریپت وانیلی

جاوا اسکریپت ساده یا جاوا اسکریپت وانیلی (Vanilla JavaScript) به زبان جاوا اسکریپت همچنان که هست و بدون هیچ گونه ابزار دیگر جهت تسهیل کدنویسی یا کارآمدتر ساختن آن گفته می‌شود. می‌توان از جاوا اسکریپت ساده برای ساخت پروژ‌ه‌های مختلف استفاده کرد، اما به مرور که با این زبان بیشتر آشنا می‌شوید، خواهید دید که ابزارهای بسیار مختلفی برای پیاده‌سازی آسان‌تر و استفاده کارآمدتر از جاوا اسکریپت معرفی ‌شده‌اند.

ابزارها و کتابخانه‌های جاوا اسکریپت

همچنان که احتمالاً می‌دانید، استفاده از جاوا اسکریپت صرف زمان زیادی از توسعه‌دهندگان می‌گیرد و همچنان که مجدداً شاید بدانید زمان طلا است. به همین جهت است که فریمورک‌ها و کتابخانه‌های جاوا اسکریپت خلق شده‌اند. ما در مطلب آموزش جاوا اسکریپت پروژه محور برخی پروژه‌های ساده جاوا اسکریپت را معرفی می‌کنیم که برای نوشتن آن‌ها به هیچ ابزار بیرونی نیاز دارید و صرفاً برای آشنا ساختن شما با روش‌‌های مقدماتی کدنویسی جاوا اسکریپت معرفی می‌شوند.

پروژ‌ه‌های عملی جاوا اسکریپت

اگر می‌خواهید یک توسعه‌دهنده وب شوید، باید کار خود را با تمرین کردن مهارت‌های جاوا اسکریپت به صورت عملی و در اولین فرصت ممکن آغاز کنید. زمانی که دانشی ابتدایی از این زبان یافتید، می‌توانید شروع به نوشتن پروژه‌های کوچک بکنید. برای آشنایی مقدماتی با زبان جاوا اسکریپت پیشنهاد می‌کنیم مجموعه مقالات زیر را مطالعه کنید:

همچنین دوره‌های آموزش ویدیویی که در این صفحه آمده‌اند، نیز می‌توانند به روند یادگیری و کسب مهارت شما در کدنویسی جاوا اسکریپت کمک کنند:

با این حال گاهی اوقات یافتن ایده‌های پروژه‌های جاوا اسکریپت که با مهارت‌های شما تطبیق داشته باشند و سرگرم‌کننده نیز باشند کار دشواری است. در این مقاله با عنوان آموزش جاوا اسکریپت پروژه محور به معرفی 15 پروژه سرگرم‌کننده می‌پردازیم که می‌توانید بی‌درنگ شروع به ساخت آن‌ها بکنید. همه این پروژه‌ها اوپن سورس هستند و می‌توانید از این کدها به هر نحو که تمایل دارید استفاده کنید.

یکی از بهترین روش‌های برای یادگیری جاوا اسکریپت یا هر زبان دیگر برنامه‌نویسی این است که زمانی را صرف ساخت تعداد زیادی پروژه بکنید. با این حال زمان ما محدود است و از این رو بهتر است روی پروژه‌هایی کار کنیم که ساخت آن‌ها آسان‌تر است. با این وجود اگر به مطالعه چیزهایی بپردازید که از قبل می‌دانید، در نهایت چیز جدیدی نخواهید آموخت. همچنین باید پروژه‌هایی برای آموزش انتخاب کنید که یادگیری آن‌ها زیاد دشوارتر از سطح کنونی مهارت‌تان نباشد.

بنابراین پیشنهاد می‌کنیم پروژه‌هایی را که در ادامه ارائه شده‌اند را ابتدا به طور اجمالی بررسی کنید و سپس آن‌ها را که با شرایط پیش‌گفته مطابقت دارند به ترتیب مورد مطالعه تفصیلی و تمرین عملی قرار دهید.

پروژه اول: ساخت و توسعه کرنومتر با جاوا اسکریپت ساده

راهنمای پروژه محور جاوا اسکریپت

ساخت یک کرنومتر با استفاده از جاوا اسکریپت کار بسیار آسانی است و حتی به عنوان یک مبتدی می‌تواند در زمان کمی این برنامه را بنویسید پس اولین پروژه ما در آموزش جاوا اسکریپت پروژه محور خواهد بود. این کرنومتر به سه دکمه نیاز دارد که کاربر از طریق آن‌ها با کرنومتر تعامل می‌یابد:

  1. شروع
  2. توقف
  3. ریست

فایل‌های این پروژه به صورت زیر هستند.

  • فایل HTML پروژه ساخت کرنومتر با جاوا اسکریپت
<div class="wrapper">
<h1>Stopwatch</h1>
<h2>Vanilla JavaScript Stopwatch</h2>
<p><span id="seconds">00</span>:<span id="tens">00</span></p>
<button id="button-start">Start</button>
<button id="button-stop">Stop</button>
<button id="button-reset">Reset</button>
</div> 
  • فایل CSS پروژه توسعه کرنومتر با جاوا اسکریپت
/* Variabes */  
$orange: #ffa600;
$grey:#f3f3f3;
$white: #fff;
$base-color:$orange ;


/* Mixin's */  
@mixin transition {
-webkit-transition: all 0.5s ease-in-out;
-moz-transition: all 0.5s ease-in-out;
transition: all 0.5s ease-in-out;
}
@mixin corners ($radius) {
-moz-border-radius: $radius;
-webkit-border-radius: $radius;
border-radius: $radius; 
-khtml-border-radius: $radius; 
}

body {
background:$base-color;
font-family: "HelveticaNeue-Light", "Helvetica Neue Light", "Helvetica Neue", Helvetica, Arial, "Lucida Grande", sans-serif; 
height:100%;
}

.wrapper {
width: 800px;
margin: 30px auto;
color:$white;
text-align:center;
}

h1, h2, h3 {
  font-family: 'Roboto', sans-serif;
  font-weight: 100;
  font-size: 2.6em;
  text-transform: uppercase;
}

#seconds, #tens{
  font-size:2em;
}

button{
@include corners (5px);
background:$base-color;
color:$white;
border: solid 1px $white;
text-decoration:none;
cursor:pointer;
font-size:1.2em;
padding:18px 10px;
width:180px;
margin: 10px;
 outline: none;
  &:hover{
	@include transition;
	background:$white;
	border: solid 1px $white;
	color:$base-color;
	}
}


  • فایل جاوا اسکریپت پروژه طراحی کرنومتر با جاوا اسکریپت
window.onload = function () {
  
  var seconds = 00; 
  var tens = 00; 
  var appendTens = document.getElementById("tens")
  var appendSeconds = document.getElementById("seconds")
  var buttonStart = document.getElementById('button-start');
  var buttonStop = document.getElementById('button-stop');
  var buttonReset = document.getElementById('button-reset');
  var Interval ;

  buttonStart.onclick = function() {
    
     clearInterval(Interval);
     Interval = setInterval(startTimer, 10);
  }
  
    buttonStop.onclick = function() {
       clearInterval(Interval);
  }
  

  buttonReset.onclick = function() {
     clearInterval(Interval);
    tens = "00";
  	seconds = "00";
    appendTens.innerHTML = tens;
  	appendSeconds.innerHTML = seconds;
  }


  function startTimer () {
    tens++; 
    
    if(tens < 9){
      appendTens.innerHTML = "0" + tens;
    }
    
    if (tens > 9){
      appendTens.innerHTML = tens;
      
    } 
    
    if (tens > 99) {
      console.log("seconds");
      seconds++;
      appendSeconds.innerHTML = "0" + seconds;
      tens = 0;
      appendTens.innerHTML = "0" + 0;
    }
    
    if (seconds > 9){
      appendSeconds.innerHTML = seconds;
    }
  
  }
  

}

برای مشاهده نسخه عملیاتی این پروژه می‌توانید به این لینک (+) رجوع کنید.

پروژه دوم: کدنویسی ساعت با جاوا اسکریپت

راهنمای پروژه محور جاوا اسکریپت

ساخت یک ساعت دیجیتال با جاوا اسکریپت کار نسبتاً آسانی است، پس پروژه دوم ما در آموزش جاوا اسکریپت پروژه محور همین موضوع خواهد بود. این یک پروژه نسبتاً کوچک است که با نوشتن آن می‌توانید با متغیرها و حلقه‌های ساده IF آشنا شوید. در این مورد نیز با استفاده از CSS طراحی خود را سفارشی‌سازی می‌کنیم تا ظاهر ساعت دیجیتالمان بهبود پیدا کند.

  • فایل HTML پروژه توسعه ساعت با جاوا اسکریپت
<div id="MyClockDisplay" class="clock" onload="showTime()"></div>

  • فایل CSS پروژه ساخت ساعت با جاوا اسکریپت
body {
    background: black;
}

.clock {
    position: absolute;
    top: 50%;
    left: 50%;
    transform: translateX(-50%) translateY(-50%);
    color: #17D4FE;
    font-size: 60px;
    font-family: Orbitron;
    letter-spacing: 7px;


}
  • فایل جاوا اسکریپت پروژه طراحی ساعت با جاوا اسکریپت
function showTime(){
    var date = new Date();
    var h = date.getHours(); // 0 - 23
    var m = date.getMinutes(); // 0 - 59
    var s = date.getSeconds(); // 0 - 59
    var session = "AM";
    
    if(h == 0){
        h = 12;
    }
    
    if(h > 12){
        h = h - 12;
        session = "PM";
    }
    
    h = (h < 10) ? "0" + h : h;
    m = (m < 10) ? "0" + m : m;
    s = (s < 10) ? "0" + s : s;
    
    var time = h + ":" + m + ":" + s + " " + session;
    document.getElementById("MyClockDisplay").innerText = time;
    document.getElementById("MyClockDisplay").textContent = time;
    
    setTimeout(showTime, 1000);
    
}

showTime();

برای مشاهده نسخه عملیاتی این مورد از آموزش جاوا اسکریپت پروژه محور به این صفحه (+)‌ مراجعه کنید.

پروژه سوم: ساخت ماشین حساب با جاوا اسکریپت

راهنمای پروژه محور جاوا اسکریپت

کدنویسی یک ماشین حساب قدیمی، رویه‌ای جالب برای بهبود مهارت‌های جاوا اسکریپت محسوب می‌شود پس سومین پروژه از آموزش جاوا اسکریپت پروژه محور را روی این موضوع متمرکز می‌کنیم. در این پروژه ابتدا اقدام به ایجاد یک اینترفیس تمیز و زیبا با استفاده از HTML و CSS و سپس قابلیت‌های مختلف را با استفاده از جاوا اسکریپت به آن اضافه می‌کنیم. کار خود را با چند عملگر و دکمه ساده برای جمع، تفریق، ‌ضرب و تقسیم آغاز می‌کنیم.

  • فایل HTML ساخت ماشین حساب با جاوا اسکریپت
<div class="calculator">
  <div class="input" id="input"></div>
  <div class="buttons">
    <div class="operators">
      <div>+</div>
      <div>-</div>
      <div>&times;</div>
      <div>&divide;</div>
    </div>
    <div class="leftPanel">
      <div class="numbers">
        <div>7</div>
        <div>8</div>
        <div>9</div>
      </div>
      <div class="numbers">
        <div>4</div>
        <div>5</div>
        <div>6</div>
      </div>
      <div class="numbers">
        <div>1</div>
        <div>2</div>
        <div>3</div>
      </div>
      <div class="numbers">
        <div>0</div>
        <div>.</div>
        <div id="clear">C</div>
      </div>
    </div>
    <div class="equal" id="result">=</div>
  </div>
</div>
  • فایل CSS پروژه کدنویسی ماشین حساب با جاوا اسکریپت
body {
  width: 500px;
  margin: 4% auto;
  font-family: 'Source Sans Pro', sans-serif;
  letter-spacing: 5px;
  font-size: 1.8rem;
  -moz-user-select: none;
  -webkit-user-select: none;
  -ms-user-select: none;
}

.calculator {
  padding: 20px;
  -webkit-box-shadow: 0px 1px 4px 0px rgba(0, 0, 0, 0.2);
  box-shadow: 0px 1px 4px 0px rgba(0, 0, 0, 0.2);
  border-radius: 1px;
}

.input {
  border: 1px solid #ddd;
  border-radius: 1px;
  height: 60px;
  padding-right: 15px;
  padding-top: 10px;
  text-align: right;
  margin-right: 6px;
  font-size: 2.5rem;
  overflow-x: auto;
  transition: all .2s ease-in-out;
}

.input:hover {
  border: 1px solid #bbb;
  -webkit-box-shadow: inset 0px 1px 4px 0px rgba(0, 0, 0, 0.2);
  box-shadow: inset 0px 1px 4px 0px rgba(0, 0, 0, 0.2);
}

.buttons {}

.operators {}

.operators div {
  display: inline-block;
  border: 1px solid #bbb;
  border-radius: 1px;
  width: 80px;
  text-align: center;
  padding: 10px;
  margin: 20px 4px 10px 0;
  cursor: pointer;
  background-color: #ddd;
  transition: border-color .2s ease-in-out, background-color .2s, box-shadow .2s;
}

.operators div:hover {
  background-color: #ddd;
  -webkit-box-shadow: 0px 1px 4px 0px rgba(0, 0, 0, 0.2);
  box-shadow: 0px 1px 4px 0px rgba(0, 0, 0, 0.2);
  border-color: #aaa;
}

.operators div:active {
  font-weight: bold;
}

.leftPanel {
  display: inline-block;
}

.numbers div {
  display: inline-block;
  border: 1px solid #ddd;
  border-radius: 1px;
  width: 80px;
  text-align: center;
  padding: 10px;
  margin: 10px 4px 10px 0;
  cursor: pointer;
  background-color: #f9f9f9;
  transition: border-color .2s ease-in-out, background-color .2s, box-shadow .2s;
}

.numbers div:hover {
  background-color: #f1f1f1;
  -webkit-box-shadow: 0px 1px 4px 0px rgba(0, 0, 0, 0.2);
  box-shadow: 0px 1px 4px 0px rgba(0, 0, 0, 0.2);
  border-color: #bbb;
}

.numbers div:active {
  font-weight: bold;
}

div.equal {
  display: inline-block;
  border: 1px solid #3079ED;
  border-radius: 1px;
  width: 17%;
  text-align: center;
  padding: 127px 10px;
  margin: 10px 6px 10px 0;
  vertical-align: top;
  cursor: pointer;
  color: #FFF;
  background-color: #4d90fe;
  transition: all .2s ease-in-out;
}

div.equal:hover {
  background-color: #307CF9;
  -webkit-box-shadow: 0px 1px 4px 0px rgba(0, 0, 0, 0.2);
  box-shadow: 0px 1px 4px 0px rgba(0, 0, 0, 0.2);
  border-color: #1857BB;
}

div.equal:active {
  font-weight: bold;
}
  • فایل جاوا اسکریپت پروژه توسعه ماشین حساب با جاوا اسکریپت
"use strict";

var input = document.getElementById('input'), // input/output button
  number = document.querySelectorAll('.numbers div'), // number buttons
  operator = document.querySelectorAll('.operators div'), // operator buttons
  result = document.getElementById('result'), // equal button
  clear = document.getElementById('clear'), // clear button
  resultDisplayed = false; // flag to keep an eye on what output is displayed

// adding click handlers to number buttons
for (var i = 0; i < number.length; i++) {
  number[i].addEventListener("click", function(e) {

    // storing current input string and its last character in variables - used later
    var currentString = input.innerHTML;
    var lastChar = currentString[currentString.length - 1];

    // if result is not diplayed, just keep adding
    if (resultDisplayed === false) {
      input.innerHTML += e.target.innerHTML;
    } else if (resultDisplayed === true && lastChar === "+" || lastChar === "-" || lastChar === "×" || lastChar === "÷") {
      // if result is currently displayed and user pressed an operator
      // we need to keep on adding to the string for next operation
      resultDisplayed = false;
      input.innerHTML += e.target.innerHTML;
    } else {
      // if result is currently displayed and user pressed a number
      // we need clear the input string and add the new input to start the new opration
      resultDisplayed = false;
      input.innerHTML = "";
      input.innerHTML += e.target.innerHTML;
    }

  });
}

// adding click handlers to number buttons
for (var i = 0; i < operator.length; i++) {
  operator[i].addEventListener("click", function(e) {

    // storing current input string and its last character in variables - used later
    var currentString = input.innerHTML;
    var lastChar = currentString[currentString.length - 1];

    // if last character entered is an operator, replace it with the currently pressed one
    if (lastChar === "+" || lastChar === "-" || lastChar === "×" || lastChar === "÷") {
      var newString = currentString.substring(0, currentString.length - 1) + e.target.innerHTML;
      input.innerHTML = newString;
    } else if (currentString.length == 0) {
      // if first key pressed is an opearator, don't do anything
      console.log("enter a number first");
    } else {
      // else just add the operator pressed to the input
      input.innerHTML += e.target.innerHTML;
    }

  });
}

// on click of 'equal' button
result.addEventListener("click", function() {

  // this is the string that we will be processing eg. -10+26+33-56*34/23
  var inputString = input.innerHTML;

  // forming an array of numbers. eg for above string it will be: numbers = ["10", "26", "33", "56", "34", "23"]
  var numbers = inputString.split(/\+|\-|\×|\÷/g);

  // forming an array of operators. for above string it will be: operators = ["+", "+", "-", "*", "/"]
  // first we replace all the numbers and dot with empty string and then split
  var operators = inputString.replace(/[0-9]|\./g, "").split("");

  console.log(inputString);
  console.log(operators);
  console.log(numbers);
  console.log("----------------------------");

  // now we are looping through the array and doing one operation at a time.
  // first divide, then multiply, then subtraction and then addition
  // as we move we are alterning the original numbers and operators array
  // the final element remaining in the array will be the output

  var divide = operators.indexOf("÷");
  while (divide != -1) {
    numbers.splice(divide, 2, numbers[divide] / numbers[divide + 1]);
    operators.splice(divide, 1);
    divide = operators.indexOf("÷");
  }

  var multiply = operators.indexOf("×");
  while (multiply != -1) {
    numbers.splice(multiply, 2, numbers[multiply] * numbers[multiply + 1]);
    operators.splice(multiply, 1);
    multiply = operators.indexOf("×");
  }

  var subtract = operators.indexOf("-");
  while (subtract != -1) {
    numbers.splice(subtract, 2, numbers[subtract] - numbers[subtract + 1]);
    operators.splice(subtract, 1);
    subtract = operators.indexOf("-");
  }

  var add = operators.indexOf("+");
  while (add != -1) {
    // using parseFloat is necessary, otherwise it will result in string concatenation :)
    numbers.splice(add, 2, parseFloat(numbers[add]) + parseFloat(numbers[add + 1]));
    operators.splice(add, 1);
    add = operators.indexOf("+");
  }

  input.innerHTML = numbers[0]; // displaying the output

  resultDisplayed = true; // turning flag if result is displayed
});

// clearing the input on press of clear
clear.addEventListener("click", function() {
  input.innerHTML = "";
})

برای مشاهده نسخه نهایی خروجی این بخش از آموزش جاوا اسکریپت پروژه محور به این صفحه (+) مراجعه کنید.

پروژه چهارم: ساخت کیت درام با جاوا اسکریپت

راهنمای پروژه محور جاوا اسکریپت

اگر می‌خواهید یک پروژه جاوا اسکریپت ایجاد کنید که سرگرمی زیادی داشته باشد، اما شما را در مسیر یادگیری این زبان نیز یاری کند، از مثال چهارم آموزش جاوا اسکریپت پروژه محور لذت زیادی خواهید برد. همه کسانی که روی این پروژه کار کرده‌اند، آن را پروژه جذابی توصیف می‌کنند، زیرا ساخت یک کیت درام موسیقی موجب سرگرمی و لذت زیادی می‌شود.

  • فایل HTML ساخت کیت دارم با جاوا اسکریپت
<main>
  <section class="main-wrapper">
    <div class="key-map-wrapper">
      <h2>Key Mapping</h2>
      <ul class="key-map-list">
        <li>
          <kbd class="key-code">E</kbd>
          <span class="key-sound">Crash</span>
        </li>
        <li>
          <kbd class="key-code">R</kbd>
          <span class="key-sound">Ride</span>
        </li>
        <li>
          <kbd class="key-code">F</kbd>
          <span class="key-sound">Floor tom</span>
        </li>
        <li>
          <kbd class="key-code">G</kbd>
          <span class="key-sound">Mid tom</span>
        </li>
        <li>
          <kbd class="key-code">H</kbd>
          <span class="key-sound">High tom</span>
        </li>
        <li>
          <kbd class="key-code">V</kbd>
          <kbd class="key-code">B</kbd>
          <span class="key-sound">Kick</span>
        </li>
        <li>
          <kbd class="key-code">J</kbd>
          <span class="key-sound">Snare</span>
        </li>
        <li>
          <kbd class="key-code">I</kbd>
          <span class="key-sound">Hi-Hat Open</span>
        </li>
        <li>
          <kbd class="key-code">K</kbd>
          <span class="key-sound">Hi-Hat Closed</span>
        </li>
      </ul>
    </div>
    <h1 class="main-title">JavaScript Drum Kit</h1>
    <div class="drum-kit-wrapper">
      <img id="crash-ride" class="crash-cymbal" src="https://raw.githubusercontent.com/ArunMichaelDsouza/javascript-30-course/master/src/01-javascript-drum-kit/img/crash.png" alt="Crash cymbal">
      <img id="hihat-top" class="hihat-top-cymbal" src="https://raw.githubusercontent.com/ArunMichaelDsouza/javascript-30-course/master/src/01-javascript-drum-kit/img/hihat-top.png" alt="Hi Hat cymbal">
      <div data-key="74" class="key snare">
        <kbd>J</kbd>
      </div>
      <div data-key="66" class="key kick">
        <kbd>B</kbd>
      </div>
      <div data-key="86" class="key kick2">
        <kbd>V</kbd>
      </div>
      <div data-key="72" class="key tom-high">
        <kbd>H</kbd>
      </div>
      <div data-key="71" class="key tom-mid">
        <kbd>G</kbd>
      </div>
      <div data-key="70" class="key tom-low">
        <kbd>F</kbd>
      </div>
      <div data-key="69" class="key crash">
        <kbd>E</kbd>
      </div>
      <div data-key="82" class="key ride">
        <kbd>R</kbd>
      </div>
      <div data-key="73" class="key hihat-open">
        <kbd>I</kbd>
      </div>
      <div data-key="75" class="key hihat-close">
        <kbd>K</kbd>
      </div>
      <img class="drum-kit" src="https://raw.githubusercontent.com/ArunMichaelDsouza/javascript-30-course/master/src/01-javascript-drum-kit/img/drum-kit.png" alt="Drum Kit" />
    </div>
  </section>
</main>
<audio data-key="74" src="https://raw.githubusercontent.com/ArunMichaelDsouza/javascript-30-course/master/src/01-javascript-drum-kit/sounds/snare.wav"></audio>
<audio data-key="66" src="https://raw.githubusercontent.com/ArunMichaelDsouza/javascript-30-course/master/src/01-javascript-drum-kit/sounds/kick.wav"></audio>
<audio data-key="86" src="https://raw.githubusercontent.com/ArunMichaelDsouza/javascript-30-course/master/src/01-javascript-drum-kit/sounds/kick.wav"></audio>
<audio data-key="72" src="https://raw.githubusercontent.com/ArunMichaelDsouza/javascript-30-course/master/src/01-javascript-drum-kit/sounds/tom-high.wav"></audio>
<audio data-key="71" src="https://raw.githubusercontent.com/ArunMichaelDsouza/javascript-30-course/master/src/01-javascript-drum-kit/sounds/tom-mid.wav"></audio>
<audio data-key="70" src="https://raw.githubusercontent.com/ArunMichaelDsouza/javascript-30-course/master/src/01-javascript-drum-kit/sounds/tom-low.wav"></audio>
<audio data-key="69" src="https://raw.githubusercontent.com/ArunMichaelDsouza/javascript-30-course/master/src/01-javascript-drum-kit/sounds/crash.wav"></audio>
<audio data-key="82" src="https://raw.githubusercontent.com/ArunMichaelDsouza/javascript-30-course/master/src/01-javascript-drum-kit/sounds/ride.wav"></audio>
<audio data-key="73" src="https://raw.githubusercontent.com/ArunMichaelDsouza/javascript-30-course/master/src/01-javascript-drum-kit/sounds/hihat-open.wav"></audio>
<audio data-key="75" src="https://raw.githubusercontent.com/ArunMichaelDsouza/javascript-30-course/master/src/01-javascript-drum-kit/sounds/hihat-close.wav"></audio>
  • فایل CSS توسعه کیت دارم با جاوا اسکریپت
@import url(https://fonts.googleapis.com/css?family=Handlee|Pacifico);

html,
body {
	padding: 0;
	margin: 0;
	background-color: #fff;
}

.main-wrapper {
	margin: 30px auto 0;
	width: 1080px;
	text-align: center;
}

.main-title {
	font-family: 'Pacifico', cursive;
	text-align: center;
	font-size: 3.2em;
	color: #cb2026;
	text-shadow: 1px 1px 1px #5a0b0d;
}

.drum-kit-wrapper {
	position: relative;
	width: 600px;
	margin: -100px auto 0;
}

.drum-kit {
	width: 100%;
	height: 520px;
	position: relative;
}

.crash-cymbal {
	position: absolute;
	top: 114px;
    left: 80px;
    transform: rotate(-7.2deg) scale(1.5);
    transition: all ease-in-out .042s;
}

.hihat-top-cymbal {
	position: absolute;
    top: 166px;
    right: 71px;
    transform: scale(1.35);
    z-index: 0;
    transition: all ease-in-out .042s;
}

.key {
	display: inline-block;
	transition: all ease-in-out .042s;
	position: absolute;
	background: #eaeaea;
    font-size: 1.5em;
    height: 32px;
    width: 32px;
    text-align: center;
    border-radius: 4px;
    border: 3px solid #aaa;
    color: #444;
    box-shadow: 1px 1px 1px rgba(0,0,0,.65);
    z-index: 2;
}

.key.kick {
	top: 355px;
    right: 250px;
}

.key.kick2 {
    top: 355px;
    right: 308px;
}

.key.snare {
	right: 145px;
    top: 280px;
}

.key.tom-high {
	right: 227px;
    top: 240px;
}

.key.tom-mid {
	left: 222px;
    top: 220px;
}

.key.tom-low {
	top: 320px;
    left: 133px;
}

.key.crash {
	top: 80px;
    left: 75px;
}

.key.ride {
	left: 165px;
    top: 87px;
}

.key.hihat-open {
	right: 165px;
    top: 144px;
}

.key.hihat-close {
	right: 60px;
    top: 150px;
}

.playing {
	transform: scale(1.12);
}

.key-map-wrapper {
	position: absolute;
    right: 0;
    top: 0;
    height: 700px;
    background: #111;
    width: 250px;
    z-index: 3;
}

.key-map-wrapper > h2 {
	color: #fff;
	font-family: 'Handlee', cursive;
	margin-bottom: 35px;
	border-bottom: 1px solid #fff;
    padding-bottom: 20px;
}

.key-map-list {
	list-style: none;
	color: #fff;
	text-align: left;
}

.key-map-list > li {
	margin-bottom: 25px;
}

.key-code {
	color: #444;
    background-color: #eaeaea;
    font-size: 1.25em;
    padding: 5px 10px;
    border-radius: 4px;
    border: 3px solid #aaa;
}

.key-sound {
	font-size: 1.2em;
	margin-left: 10px;
	font-family: 'Handlee', cursive;
	vertical-align: middle;
}
  • فایل جاوا اسکریپت پروژه کدنویسی کیت درام با جاوا اسکریپت
// JavaScript Drum Kit App

{
	const playingClass = 'playing',
		crashRide = document.getElementById('crash-ride'),
		hiHatTop = document.getElementById('hihat-top');

	const animateCrashOrRide = () => {
		crashRide.style.transform = 'rotate(0deg) scale(1.5)';
	};

	const animateHiHatClosed = () => {
		hiHatTop.style.top = '171px';
	};

	const playSound = e => {
		const keyCode = e.keyCode,
			keyElement = document.querySelector(`div[data-key="${keyCode}"]`);

		if(!keyElement) return;

		const audioElement = document.querySelector(`audio[data-key="${keyCode}"]`);
		audioElement.currentTime = 0;
		audioElement.play();

		switch(keyCode) {
			case 69:
			case 82:
				animateCrashOrRide();
				break;
			case 75:
				animateHiHatClosed();
				break;
		}

		keyElement.classList.add(playingClass);
	};

	const removeCrashRideTransition = e => {
		if(e.propertyName !== 'transform') return;

		e.target.style.transform = 'rotate(-7.2deg) scale(1.5)';
	};

	const removeHiHatTopTransition = e => {
		if(e.propertyName !== 'top') return;

		e.target.style.top = '166px';
	};	

	const removeKeyTransition = e => {
		if(e.propertyName !== 'transform') return;

		e.target.classList.remove(playingClass)
	};

	const drumKeys = Array.from(document.querySelectorAll('.key'));

	drumKeys.forEach(key => {
		key.addEventListener('transitionend', removeKeyTransition);
	});

	crashRide.addEventListener('transitionend', removeCrashRideTransition);
	hiHatTop.addEventListener('transitionend', removeHiHatTopTransition);

	window.addEventListener('keydown', playSound);
}

برای مشاهده نسخه نهایی این پروژه به این صفحه (+) مراجعه کنید.

پروژه پنجم: کدنویسی بازی حدس زدن رنگ با جاوا اسکریپت

راهنمای پروژه محور جاوا اسکریپت

کدنویسی یک بازی حدس زدن رنگ با جاوا اسکریپت کار بسیار آسانی محسوب می‌شود پس اجازه بدهید پنجمین پروژه از آموزش جاوا اسکریپت پروژه محور را به این موضوع اختصاص دهیم. در این پروژه، یک بازی می‌سازیم که در آن بازیکن یک مقدار منفرد RGB برای یک رنگ می‌بیند. این بازیکن باید روی رنگی که با مقدار RGB نمایش یافته منطبق است کلیک کند.

امکان افزودن قابلیت‌های بیشتر به این پروژه جهت دشوارتر ساختن آن وجود دارد. برای نمونه می‌توانید تعداد حدس‌ها را محدود سازید یا به بازیکن‌ها «جان» (Live) بدهید تا در صورت اشتباه‌های مکرر، جان‌های خود را از دست بدهند.

  • فایل HTML توسعه بازی حدس زدن رنگ با جاوا اسکریپت
<html>
<head>
	<title>Color Game</title>
	<link rel="stylesheet" type="text/css" href="style.css">
	<link href='https://fonts.googleapis.com/css?family=Raleway:300' rel='stylesheet' type='text/css'>	

</head>
<body>
	<h1>The Great <span id="color-display">RGB</span> Guessing Game</h1>
	<div id ="stripe">
		<button id="reset">New Colors</button>
		<span id="message"></span>
		<button class="mode">Easy</button>
		<button class="mode selected">Hard</button>
	</div>
	<div id="container">
		<div class="square"></div>
		<div class="square"></div>
		<div class="square"></div>
		<div class="square"></div>
		<div class="square"></div>
		<div class="square"></div>
	</div>

	<script type="text/javascript" src="script.js"></script>
<!-- 	<script type="text/javascript" src="colorGame.js"></script>
 --></body>
</html>
  • فایل CSS ساخت بازی حدس زدن رنگ با جاوا اسکریپت
body {
	background-color: #232323;
	font-family: "Raleway", Sans-serif;
	font-size: 62.5%; /*1 em = 10px */
	margin: 0;
}

#container {
	max-width: 600px;
	margin: 0 auto;
	padding-top: 20px;

}
.square {
	width: 30%;
	background-color: purple;
	padding-bottom: 30%;
	float: left;
	margin: 1.66%;
	transition: background .5s;
	-webkit-transition: background .5s;
	-moz-transition: background .5s;
	o-transition: background .5s;
} 

h1 {
	color: white;
	background-color: #2C8E99;
	font-size: 3.5em;
	text-align: center;
	text-transform: uppercase;
	margin: 0;
	padding: 10px 0;
}

#color-display {
	display: block;
	font-size: 2em;
}

#stripe {
	background: white;
	height: 30px;
	text-align: center;
	color: black;
}

#message {
	text-transform: uppercase;
	color: #2C8E99;
	font-size: 1.5em;
	display: inline-block;
	width: 20%;
}

button {
	outline: none;
	color: #2C8E99;
	font-family: "Raleway", Sans-serif;
	text-transform: uppercase;
	font-size: 1.5em;
	background-color: white;
	height: 100%;
	letter-spacing: 1px;
	transition: all 0.3s;
	-webkit-transition: all 0.3s;
	-moz-transition: all 0.3s;
	o-transition: all 0.3s;
}

button:hover {
	background-color: #2C8E99;
	color: white;
}

.selected {
	background-color: #2C8E99;
	color: white;
}

.square {
	border-radius: 20%;
}

* {
	border: 0px solid red;
}


  • فایل جاوا اسکریپت پروژه کدنویسی بازی حدس زدن رنگ با جاوا اسکریپت
var numSquares = 6;
var colors = [];
var pickedColor;

var squares = document.querySelectorAll(".square");
var colorDisplay = document.querySelector("#color-display");
var messageDisplay = document.querySelector("#message");
var h1 = document.querySelector("h1");
var resetButton = document.querySelector("#reset");
var modeButtons = document.querySelectorAll(".mode");
var easyButton = document.querySelector(".mode");

init();

function init() {
	colorDisplay.textContent = pickedColor;
	setupSquares();
	setupMode();
	reset();
}

resetButton.addEventListener("click", function() {
	reset();
});

function setupSquares() {
	for (var i = 0; i < squares.length; i++) {
		squares[i].style.backgroundColor = colors[i];
		squares[i].addEventListener("click", function() {
			var clickedColor = this.style.backgroundColor;
			if(clickedColor === pickedColor) {
				messageDisplay.textContent = "Correct";
				resetButton.textContent = "Play Again";
				changeColors(pickedColor);
			}
			else {
				this.style.backgroundColor = "#232323";
				messageDisplay.textContent = "try again";
			}
		});
	}
}

function setupMode() {
	for(var i = 0; i < modeButtons.length; i++) {
		modeButtons[i].addEventListener("click", function() {
			for (var i = 0; i < modeButtons.length; i++) {
				modeButtons[i].classList.remove("selected");
			}
			this.classList.add("selected");
			if (this.textContent === "Easy") {
				numSquares = 3;
			}
			else {
				numSquares = 6;
			}
			reset();
		});
	}
}

function reset() {
	colors = genRandomColors(numSquares);
	pickedColor = chooseColor();
	colorDisplay.textContent = pickedColor;
	h1.style.backgroundColor = "#2C8E99";
	resetButton.textContent = "New Colors";
	messageDisplay.textContent = "";
	for (var i = 0; i < squares.length; i++) {
		if(colors[i]) { 
			squares[i].style.display = "block";
			squares[i].style.backgroundColor = colors[i];
		}
		else {
			squares[i].style.display = "none";
		}
	}
}

function changeColors(color) {
	for(var i = 0; i < squares.length; i++) {
		squares[i].style.backgroundColor = color;
		h1.style.backgroundColor = color;
	}
}

function chooseColor() {
	var random = Math.floor(Math.random() * colors.length);
	return colors[random];
}

function genRandomColors(num) {
	var arr = [];
	for (var i = 0; i < num; i++) {
		arr.push(makeColor());
	}
	return arr;
}

function makeColor() {
	var r = Math.floor(Math.random() * 256);
	var g = Math.floor(Math.random() * 256);
	var b = Math.floor(Math.random() * 256);
	return "rgb(" + r + ", " + g + ", " + b + ")"; 
}


برای مشاهده نسخه عملیاتی این بازی به این صفحه (+) مراجعه کنید.

پروژه ششم: ساخت بازی HANGMAN با جاوا اسکریپت

راهنمای پروژه محور جاوا اسکریپت

ساخت بازی HANGMAN یکی از بهترین ایده‌ها برای تمرین توسط افراد مبتدی است که نیازمند کمی چالش هستند، از همین روش ششمین مورد از آموزش جاوا اسکریپت پروژه محور را به آن اختصاص داده‌ایم. این بازی در مورد حدس زدن یک کلمه تصادفی به صورت حرف به حرف است که در صورت پایان یافتن تعداد حدس‌های کاربر، بازی تمام می‌شود. با این که روند بازی ممکن است ساده به نظر بیاید، اما باید چند نکته مهم را در کد جاوا اسکریپت خود در نظر بگیرید:

  • حد بیشینه‌ای برای تعداد حدس‌ها در نظر بگیرید.
  • تعداد باقیمانده حدس‌های بازیکن را نمایش دهید.
  • یک رابط کاربری برای وارد کردن حدس‌ها در اختیار بازیکن قرار دهید.

نوشتن این پروژه جاوا اسکریپت احتمالاً به زمان بیشتری نیاز دارد و باید در مورد گزینه تصادفی، متغیرها، مقادیر بولی، ورودی‌ها، خروجی‌ها، رشته‌ها طول متغیرها و موارد دیگر بیاندیشید.

  • فایل HTML ساخت بازی HANGMAN با جاوا اسکریپت
<div class="wrapper">
   <h1>Hangman</h1>
    <h2>Vanilla JavaScript Hangman Game</h2>
    <p>Use the alphabet below to guess the word, or click hint to get a clue. </p>
</div>
<div class="wrapper">
    <div id="buttons">
    </div>  
    <p id="catagoryName"></p>
    <div id="hold">
    </div>
    <p id="mylives"></p>
    <p id="clue">Clue -</p>  
     <canvas id="stickman">This Text will show if the Browser does NOT support HTML5 Canvas tag</canvas>
    <div class="container">
      <button id="hint">Hint</button>
      <button id="reset">Play again</button>
    </div>
</div>


  • فایل CSS کدنویسی بازی HANGMAN با جاوا اسکریپت
/* Variabes */  
$orange: #ffa600;
$green: #c1d72e;
$blue: #82d2e5;
$grey:#f3f3f3;
$white: #fff;
$base-color:$green ;

/* Mixin's */ 

@mixin transition {
  -webkit-transition: all 0.5s ease-in-out;
  -moz-transition: all 0.5s ease-in-out;
  transition: all 0.5s ease-in-out;
}

@mixin clear {
  &:after {
      content: "";
      display: table;
      clear: both;
    }
}

 @mixin box-size {
  -webkit-box-sizing: border-box;
  -moz-box-sizing: border-box;
  box-sizing: border-box;
}

 @mixin transition {
  -webkit-transition: all 0.3s ease-in-out;
  -moz-transition: all 0.3s ease-in-out;
  transition: all 0.3s ease-in-out;
}

@mixin fade {
  -moz-transition: all 1s ease-in;
  -moz-transition:all 0.3s ease-in-out;
  -webkit-transition:all 0.3s ease-in-out;
}

@mixin opacity {
  opacity:0.4;
  filter:alpha(opacity=40); 
  @include fade;
}

@mixin corners ($radius) {
  -moz-border-radius: $radius;
  -webkit-border-radius: $radius;
  border-radius: $radius; 
  -khtml-border-radius: $radius; 
}

body {
  background:$base-color;
  font-family: "HelveticaNeue-Light", "Helvetica Neue Light", "Helvetica Neue", Helvetica, Arial, "Lucida Grande", sans-serif; 
  color:$white;
  height:100%;
  text-align:center;
  font-size:18px;
}

.wrappper{
  @include clear;
  width:100%;
  margin:0 auto;
}


canvas{
  color:$white;
  border: $white dashed 2px;
  padding:15px;
}

h1, h2, h3 {
	font-family: 'Roboto', sans-serif;
	font-weight: 100;
	text-transform: uppercase;
   margin:5px 0;
}

h1 {
	font-size: 2.6em;
}

h2 {
	font-size: 1.6em;
}

p{
  font-size: 1.6em;
}

#alphabet {
  @include clear;
  margin:15px auto;
  padding:0;
  max-width:900px;
}

#alphabet li {
  float:left;
  margin: 0 10px 10px 0;
  list-style:none;
  width:35px;
  height:30px;
  padding-top:10px;
  background:$white;
  color:$base-color;
  cursor:pointer;
  @include corners(5px);
  border: solid 1px $white;
    
    &:hover{
      background:$base-color;
      border: solid 1px $white;
      color:$white;
    }
}

#my-word {
  margin: 0;
  display: block;
  padding: 0;
  display:block;
}

#my-word li {
  position: relative;
  list-style: none;
  margin: 0;
  display: inline-block;
  padding: 0 10px;
  font-size:1.6em;
}

.active {
  @include opacity;
  cursor:default;
    
  &:hover{
      @include fade;
      @include opacity;
    }
}

#mylives{
  font-size:1.6em;
  text-align:center;
  display:block;
}

button{
  @include corners (5px);
  background:$base-color;
  color:$white;
  border: solid 1px $white;
  text-decoration:none;
  cursor:pointer;
  font-size:1.2em;
  padding:18px 10px;
  width:180px;
  margin: 10px;
  outline: none;
  
    &:hover{
      @include transition;
      background:$white;
      border: solid 1px $white;
      color:$base-color;
    }
}

@media (max-width: 767px) {
  #alphabet {
  padding:0 0 0 15px;
}
  }

  @media (max-width: 480px) {
  #alphabet {
  padding:0 0 0 25px;
}
  }
  • فایل جاوا اسکریپت پروژه ساخت بازی HANGMAN با جاوا اسکریپت
window.onload = function () {

  var alphabet = ['a', 'b', 'c', 'd', 'e', 'f', 'g', 'h',
        'i', 'j', 'k', 'l', 'm', 'n', 'o', 'p', 'q', 'r', 's',
        't', 'u', 'v', 'w', 'x', 'y', 'z'];
  
  var categories;         // Array of topics
  var chosenCategory;     // Selected catagory
  var getHint ;          // Word getHint
  var word ;              // Selected word
  var guess ;             // Geuss
  var geusses = [ ];      // Stored geusses
  var lives ;             // Lives
  var counter ;           // Count correct geusses
  var space;              // Number of spaces in word '-'

  // Get elements
  var showLives = document.getElementById("mylives");
  var showCatagory = document.getElementById("scatagory");
  var getHint = document.getElementById("hint");
  var showClue = document.getElementById("clue");


  // create alphabet ul
  var buttons = function () {
    myButtons = document.getElementById('buttons');
    letters = document.createElement('ul');

    for (var i = 0; i < alphabet.length; i++) {
      letters.id = 'alphabet';
      list = document.createElement('li');
      list.id = 'letter';
      list.innerHTML = alphabet[i];
      check();
      myButtons.appendChild(letters);
      letters.appendChild(list);
    }
  }
    
  
  // Select Catagory
  var selectCat = function () {
    if (chosenCategory === categories[0]) {
      catagoryName.innerHTML = "The Chosen Category Is Premier League Football Teams";
    } else if (chosenCategory === categories[1]) {
      catagoryName.innerHTML = "The Chosen Category Is Films";
    } else if (chosenCategory === categories[2]) {
      catagoryName.innerHTML = "The Chosen Category Is Cities";
    }
  }

  // Create geusses ul
   result = function () {
    wordHolder = document.getElementById('hold');
    correct = document.createElement('ul');

    for (var i = 0; i < word.length; i++) {
      correct.setAttribute('id', 'my-word');
      guess = document.createElement('li');
      guess.setAttribute('class', 'guess');
      if (word[i] === "-") {
        guess.innerHTML = "-";
        space = 1;
      } else {
        guess.innerHTML = "_";
      }

      geusses.push(guess);
      wordHolder.appendChild(correct);
      correct.appendChild(guess);
    }
  }
  
  // Show lives
   comments = function () {
    showLives.innerHTML = "You have " + lives + " lives";
    if (lives < 1) {
      showLives.innerHTML = "Game Over";
    }
    for (var i = 0; i < geusses.length; i++) {
      if (counter + space === geusses.length) {
        showLives.innerHTML = "You Win!";
      }
    }
  }

      // Animate man
  var animate = function () {
    var drawMe = lives ;
    drawArray[drawMe]();
  }

  
   // Hangman
  canvas =  function(){

    myStickman = document.getElementById("stickman");
    context = myStickman.getContext('2d');
    context.beginPath();
    context.strokeStyle = "#fff";
    context.lineWidth = 2;
  };
  
    head = function(){
      myStickman = document.getElementById("stickman");
      context = myStickman.getContext('2d');
      context.beginPath();
      context.arc(60, 25, 10, 0, Math.PI*2, true);
      context.stroke();
    }
    
  draw = function($pathFromx, $pathFromy, $pathTox, $pathToy) {
    
    context.moveTo($pathFromx, $pathFromy);
    context.lineTo($pathTox, $pathToy);
    context.stroke(); 
}

   frame1 = function() {
     draw (0, 150, 150, 150);
   };
   
   frame2 = function() {
     draw (10, 0, 10, 600);
   };
  
   frame3 = function() {
     draw (0, 5, 70, 5);
   };
  
   frame4 = function() {
     draw (60, 5, 60, 15);
   };
  
   torso = function() {
     draw (60, 36, 60, 70);
   };
  
   rightArm = function() {
     draw (60, 46, 100, 50);
   };
  
   leftArm = function() {
     draw (60, 46, 20, 50);
   };
  
   rightLeg = function() {
     draw (60, 70, 100, 100);
   };
  
   leftLeg = function() {
     draw (60, 70, 20, 100);
   };
  
  drawArray = [rightLeg, leftLeg, rightArm, leftArm,  torso,  head, frame4, frame3, frame2, frame1]; 


  // OnClick Function
   check = function () {
    list.onclick = function () {
      var geuss = (this.innerHTML);
      this.setAttribute("class", "active");
      this.onclick = null;
      for (var i = 0; i < word.length; i++) {
        if (word[i] === geuss) {
          geusses[i].innerHTML = geuss;
          counter += 1;
        } 
      }
      var j = (word.indexOf(geuss));
      if (j === -1) {
        lives -= 1;
        comments();
        animate();
      } else {
        comments();
      }
    }
  }
  
    
  // Play
  play = function () {
    categories = [
        ["everton", "liverpool", "swansea", "chelsea", "hull", "manchester-city", "newcastle-united"],
        ["alien", "dirty-harry", "gladiator", "finding-nemo", "jaws"],
        ["manchester", "milan", "madrid", "amsterdam", "prague"]
    ];

    chosenCategory = categories[Math.floor(Math.random() * categories.length)];
    word = chosenCategory[Math.floor(Math.random() * chosenCategory.length)];
    word = word.replace(/\s/g, "-");
    console.log(word);
    buttons();

    geusses = [ ];
    lives = 10;
    counter = 0;
    space = 0;
    result();
    comments();
    selectCat();
    canvas();
  }

  play();
  
  // Hint

    hint.onclick = function() {

      hints = [
        ["Based in Mersyside", "Based in Mersyside", "First Welsh team to reach the Premier Leauge", "Owned by A russian Billionaire", "Once managed by Phil Brown", "2013 FA Cup runners up", "Gazza's first club"],
        ["Science-Fiction horror film", "1971 American action film", "Historical drama", "Anamated Fish", "Giant great white shark"],
        ["Northern city in the UK", "Home of AC and Inter", "Spanish capital", "Netherlands capital", "Czech Republic capital"]
    ];

    var catagoryIndex = categories.indexOf(chosenCategory);
    var hintIndex = chosenCategory.indexOf(word);
    showClue.innerHTML = "Clue: - " +  hints [catagoryIndex][hintIndex];
  };

   // Reset

  document.getElementById('reset').onclick = function() {
    correct.parentNode.removeChild(correct);
    letters.parentNode.removeChild(letters);
    showClue.innerHTML = "";
    context.clearRect(0, 0, 400, 400);
    play();
  }
}

برای مشاهده نسخه عملیاتی این پروژه به این صفحه (+) مراجعه کنید.

پروژه هفتم: ساخت بازی دوز با جاوا اسکریپت

راهنمای پروژه محور جاوا اسکریپت

ساخت یک بازی دوز ساده با جاوا اسکریپت می‌توانید یک پروژه عالی دیگر باشد که می‌توانید در مدت کوتاهی آن را انجام دهید. در این پروژه ابتدا یک شبکه 3 در 3 ایجاد می‌کنیم که بازیکنان به ترتیب این شبکه را با علامت‌های ضربدر و دایره پر می‌کنند. بازیکن برنده کسی است که بتواند قبل از دیگری سه علامت را در یک ردیف افقی، عمودی یا قطری قرار دهد.

با این که این یک بازی ساده به حساب می‌آید، باید شیوه ایجاد منطق قواعد بازی را در جاوا اسکریپت بدانید. از این رو پیش از شروع به نوشتن این کد، ابتدا مراحل منطقی بازی را به صورت گام به گام تجزیه کنید. برای نمونه رسم یک فلوچارت برای بصری‌سازی خروج‌های مختلف بازی می‌تواند کمک شایان توجهی بکند. زمانی که توانستید فرایند بازی را روی کاغذ ببینید، می‌توانید شروع به کدنویسی عملی بکنید.

  • فایل HTML ساخت بازی دوز با جاوا اسکریپت
<html>
	<head>
	  <meta charset="utf-8" />
	  <meta http-equiv="X-UA-Compatible" content="IE=edge">
	  <meta name="description" content="">
	  <meta name="viewport" content="width=device-width, initial-scale=1.0" />
	  <title>FreeCodeCamp: Tictactoe</title>
		<link rel="stylesheet" href="../css/tictactoe.css" />
	</head>

	<body>
		<div class="app">
			<div class="container-fluid app-container">
	    	<div class="row app-row">
		    	<div class="col-xs-4 play-box" id="0">
		    		<div class="symbol"></div>
		    	</div>
		    	<div class="col-xs-4 play-box" id="1">
		    		<div class="symbol"></div>
		    	</div>
		    	<div class="col-xs-4 play-box last-right" id="2">
		    		<div class="symbol"></div>
		    	</div>
		    	<div class="col-xs-4 play-box" id="3">
		    		<div class="symbol"></div>
		    	</div>
		    	<div class="col-xs-4 play-box" id="4">
		    		<div class="symbol"></div>
		    	</div>
		    	<div class="col-xs-4 play-box last-right" id="5">
		    		<div class="symbol"></div>
		    	</div>
		    	<div class="col-xs-4 play-box last-bottom" id="6">
		    		<div class="symbol"></div>
		    	</div>
		    	<div class="col-xs-4 play-box last-bottom" id="7">
		    		<div class="symbol"></div>
		    	</div>
		    	<div class="col-xs-4 play-box last-right last-bottom" id="8">
		    		<div class="symbol"></div>
		    	</div>
		    </div>
			</div>
		</div>

		<div class="modal fade app-modal" tabindex="-1" role="dialog" aria-labelledby="mySmallModalLabel">
		  <div class="modal-dialog modal-size">
		    <div class="modal-content">
		      <h3 class="content heading">Warning!!!</h3>
		      <hr class="warning-hr">
		      <div class="content body">
			      Please save your time and don't even think you're smart. <br><strong><em>I'M SMARTER THAN YOU! HA-HA-HA!!!</em></strong> <br>
			      Wana try me? Chose : <br>
			      <div class="center-block symbol-options">
			      	<button class="symbol-option btn btn-default btn-md" data-dismiss="modal">X</button> OR <button class="symbol-option btn btn-default btn-md" data-dismiss="modal">O</button>
			      </div>
		      </div>
		    </div>
		  </div>
		</div>

		<script src="../js/bundled/tictactoe.bundled.js">
		</script>
	</body>
</html>
  • فایل CSS توسعه بازی دوز با جاوا اسکریپت
@import url(https://fonts.googleapis.com/css?family=Yesteryear);

$app-background-color : #508ABB;
$app-row-height : 100%;
$winAnimStartColor : cyan;
$winAnimEndColor : #508ABB;

// html, body, div, span, a, li, td, th {
// 	font-family: 'Lato', sans-serif;
// 	font-weight: 300;
//
// }

@-webkit-keyframes winAnim{
	0% {
    background-color: $winAnimStartColor;
  }
  100% {
    background-color: $winAnimEndColor;
  }
}
@-moz-keyframes winAnim{
  0% {
    background-color: $winAnimStartColor;
  }
  100% {
    background-color: $winAnimEndColor;
  }
}
@-o-keyframes winAnim {
  0% {
    background-color: $winAnimStartColor;
  }
  100% {
    background-color: $winAnimEndColor;
  }
}
@keyframes winAnim {
  0% {
    background-color: $winAnimStartColor;
  }
  100% {
    background-color: $winAnimEndColor;
  }
}

@keyframes winAnim {
  0% {
    background-color: $winAnimStartColor;
  }
  100% {
    background-color: $winAnimEndColor;
  }
}

*{
  -webkit-touch-callout: none;
  -webkit-user-select: none;
  -khtml-user-select: none;
  -moz-user-select: none;
  -ms-user-select: none;
  user-select: none;
  outline-style:none;/*IE*/
}

.center-box{
	margin : auto;
	position: absolute;
	top : 0;
	right : 0;
	bottom : 0;
	left : 0;
}

html,body{
	//background-image: linear-gradient(to bottom,#dddbd1,#d2dbdc);
	background-color: #d2dbdc;
	height : 100%;
	width  : 100%;
}

.app{
	@extend .center-box;
	width : 80%;
	height : 70%;
	max-width: 550px;
	background-color : $app-background-color;
	box-shadow: 0 5px 30px -5px rgba(0,0,0, .85);
	border-radius: 10px;
	.app-container,
	.app-row{
		height: $app-row-height;
	}
}
.play-box,.symbol-option{
	font-family: 'Yesteryear', cursive;
}

.play-box{
	border-bottom : 2px solid #fff;
	border-right : 2px solid #fff;
	height : $app-row-height / 3;
	cursor: pointer;
	position: relative;
	&.last-right{
		border-right : none;
	}
	&.last-bottom{
		border-bottom : none;
	}
	&.win {
		-webkit-animation: winAnim .2s ease-out infinite;
	  -moz-animation:    winAnim .2s ease-out infinite;
	  -o-animation:      winAnim .2s ease-out infinite;
	  animation:         winAnim .2s ease-out infinite;
		animation : winAnim .5s infinite;
	}
	.symbol{
		@extend .center-box;
		width: 50%;
		height : 50px;
		text-align: center;
		line-height : 50px;
		font-size: 35px;
		color : white;
	}
}

.modal-content{
	.content{
		padding : 15px;
		text-align: center;
		margin : 0;
		&.body{
			line-height: 2;
		}
	}
	.symbol-options{
		width: 200px;
		margin-top: 10px;
		.symbol-option{
			&:first-child{
				margin-right: 10px;
			}
			&:last-child{
				margin-left: 10px;
			}
		}
	}
	.warning-hr{
		margin: 0;
	}
}

برای مشاهده کد جاوا اسکریپت و نسخه عملیاتی این بخش از آموزش جاوا اسکریپت پروژه محور به این صفحه (+) مراجعه کنید.

پروژه هشتم: ساخت بازی PONG با جاوا اسکریپت

راهنمای پروژه محور جاوا اسکریپت

Pong یکی از بازی‌های محبوب بسیاری از کاربران است. ساخت این بازی در جاوا اسکریپت نیاز به کمی تلاش دارد، اما سرگرمی زیادی نیز ایجاد می‌کند. در این مورد نیز ابتدا باید در مورد قواعد بازی تأمل کنیم و رویدادهای مختلفی که باید کدنویسی شوند را مشخص سازیم. در زمان ساخت بازی احتمالاً ایده‌های مختلفی برای جذاب‌تر ساختن آن به ذهنتان می‌رسد.

همچنین ممکن است بخواهید سطوح مختلف دشواری برای بازی طراحی کنید. برای نمونه توپ می‌تواند پس از تعداد مشخصی دور، ‌سریع‌تر حرکت کند. ضمن اینکه به منظور دشوار شدن کارها برای بازیکن، می‌توانید کاری کنید که رایانه موانع را سریع‌تر جابجا کند.

در صورتی که به تازگی با جاوا اسکریپت آشنا شده باشید، پیاده‌سازی بازی Pong یک پروژه نسبتاً پیچیده برایتان خواهد بود. بنابراین در این حالت پیشنهاد می‌کنیم ابتدا کار خود را با پروژه‌های آسان‌تر که در بخش‌های قبلی مقاله آموزش جاوا اسکریپت پروژه محور معرفی کردیم آغاز کنید. احتمالاً دشوارترین بخش این پروژه آن است که مطمئن شوید رایانه همواره برنده نمی‌شود. از این رو باید اطمینان حاصل کنید که قبلاً برخی پروژه‌های آسان‌تر را پیاده‌سازی کرده‌اید، تا با ظرائف کارها آشنا شوید.

  • فایل HTML توسعه بازی PONG با جاوا اسکریپت
<canvas></canvas>
  • فایل CSS ساخت بازی PONG با جاوا اسکریپت
body {
	text-align: center;
}
  • فایل جاوا اسکریپت پروژه کدنویسی بازی PONG با جاوا اسکریپت
// Global Variables
var DIRECTION = {
	IDLE: 0,
	UP: 1,
	DOWN: 2,
	LEFT: 3,
	RIGHT: 4
};

var rounds = [5, 5, 3, 3, 2];
var colors = ['#1abc9c', '#2ecc71', '#3498db', '#e74c3c', '#9b59b6'];

// The ball object (The cube that bounces back and forth)
var Ball = {
	new: function (incrementedSpeed) {
		return {
			width: 18,
			height: 18,
			x: (this.canvas.width / 2) - 9,
			y: (this.canvas.height / 2) - 9,
			moveX: DIRECTION.IDLE,
			moveY: DIRECTION.IDLE,
			speed: incrementedSpeed || 9
		};
	}
};

// The paddle object (The two lines that move up and down)
var Paddle = {
	new: function (side) {
		return {
			width: 18,
			height: 70,
			x: side === 'left' ? 150 : this.canvas.width - 150,
			y: (this.canvas.height / 2) - 35,
			score: 0,
			move: DIRECTION.IDLE,
			speed: 10
		};
	}
};

var Game = {
	initialize: function () {
		this.canvas = document.querySelector('canvas');
		this.context = this.canvas.getContext('2d');

		this.canvas.width = 1400;
		this.canvas.height = 1000;

		this.canvas.style.width = (this.canvas.width / 2) + 'px';
		this.canvas.style.height = (this.canvas.height / 2) + 'px';

		this.player = Paddle.new.call(this, 'left');
		this.paddle = Paddle.new.call(this, 'right');
		this.ball = Ball.new.call(this);

		this.paddle.speed = 8;
		this.running = this.over = false;
		this.turn = this.paddle;
		this.timer = this.round = 0;
		this.color = '#2c3e50';

		Pong.menu();
		Pong.listen();
	},

	endGameMenu: function (text) {
		// Change the canvas font size and color
		Pong.context.font = '50px Courier New';
		Pong.context.fillStyle = this.color;

		// Draw the rectangle behind the 'Press any key to begin' text.
		Pong.context.fillRect(
			Pong.canvas.width / 2 - 350,
			Pong.canvas.height / 2 - 48,
			700,
			100
		);

		// Change the canvas color;
		Pong.context.fillStyle = '#ffffff';

		// Draw the end game menu text ('Game Over' and 'Winner')
		Pong.context.fillText(text,
			Pong.canvas.width / 2,
			Pong.canvas.height / 2 + 15
		);

		setTimeout(function () {
			Pong = Object.assign({}, Game);
			Pong.initialize();
		}, 3000);
	},

	menu: function () {
		// Draw all the Pong objects in their current state
		Pong.draw();

		// Change the canvas font size and color
		this.context.font = '50px Courier New';
		this.context.fillStyle = this.color;

		// Draw the rectangle behind the 'Press any key to begin' text.
		this.context.fillRect(
			this.canvas.width / 2 - 350,
			this.canvas.height / 2 - 48,
			700,
			100
		);

		// Change the canvas color;
		this.context.fillStyle = '#ffffff';

		// Draw the 'press any key to begin' text
		this.context.fillText('Press any key to begin',
			this.canvas.width / 2,
			this.canvas.height / 2 + 15
		);
	},

	// Update all objects (move the player, paddle, ball, increment the score, etc.)
	update: function () {
		if (!this.over) {
			// If the ball collides with the bound limits - correct the x and y coords.
			if (this.ball.x <= 0) Pong._resetTurn.call(this, this.paddle, this.player);
			if (this.ball.x >= this.canvas.width - this.ball.width) Pong._resetTurn.call(this, this.player, this.paddle);
			if (this.ball.y <= 0) this.ball.moveY = DIRECTION.DOWN;
			if (this.ball.y >= this.canvas.height - this.ball.height) this.ball.moveY = DIRECTION.UP;

			// Move player if they player.move value was updated by a keyboard event
			if (this.player.move === DIRECTION.UP) this.player.y -= this.player.speed;
			else if (this.player.move === DIRECTION.DOWN) this.player.y += this.player.speed;

			// On new serve (start of each turn) move the ball to the correct side
			// and randomize the direction to add some challenge.
			if (Pong._turnDelayIsOver.call(this) && this.turn) {
				this.ball.moveX = this.turn === this.player ? DIRECTION.LEFT : DIRECTION.RIGHT;
				this.ball.moveY = [DIRECTION.UP, DIRECTION.DOWN][Math.round(Math.random())];
				this.ball.y = Math.floor(Math.random() * this.canvas.height - 200) + 200;
				this.turn = null;
			}

			// If the player collides with the bound limits, update the x and y coords.
			if (this.player.y <= 0) this.player.y = 0;
			else if (this.player.y >= (this.canvas.height - this.player.height)) this.player.y = (this.canvas.height - this.player.height);

			// Move ball in intended direction based on moveY and moveX values
			if (this.ball.moveY === DIRECTION.UP) this.ball.y -= (this.ball.speed / 1.5);
			else if (this.ball.moveY === DIRECTION.DOWN) this.ball.y += (this.ball.speed / 1.5);
			if (this.ball.moveX === DIRECTION.LEFT) this.ball.x -= this.ball.speed;
			else if (this.ball.moveX === DIRECTION.RIGHT) this.ball.x += this.ball.speed;

			// Handle paddle (AI) UP and DOWN movement
			if (this.paddle.y > this.ball.y - (this.paddle.height / 2)) {
				if (this.ball.moveX === DIRECTION.RIGHT) this.paddle.y -= this.paddle.speed / 1.5;
				else this.paddle.y -= this.paddle.speed / 4;
			}
			if (this.paddle.y < this.ball.y - (this.paddle.height / 2)) {
				if (this.ball.moveX === DIRECTION.RIGHT) this.paddle.y += this.paddle.speed / 1.5;
				else this.paddle.y += this.paddle.speed / 4;
			}

			// Handle paddle (AI) wall collision
			if (this.paddle.y >= this.canvas.height - this.paddle.height) this.paddle.y = this.canvas.height - this.paddle.height;
			else if (this.paddle.y <= 0) this.paddle.y = 0;

			// Handle Player-Ball collisions
			if (this.ball.x - this.ball.width <= this.player.x && this.ball.x >= this.player.x - this.player.width) {
				if (this.ball.y <= this.player.y + this.player.height && this.ball.y + this.ball.height >= this.player.y) {
					this.ball.x = (this.player.x + this.ball.width);
					this.ball.moveX = DIRECTION.RIGHT;

					beep1.play();
				}
			}

			// Handle paddle-ball collision
			if (this.ball.x - this.ball.width <= this.paddle.x && this.ball.x >= this.paddle.x - this.paddle.width) {
				if (this.ball.y <= this.paddle.y + this.paddle.height && this.ball.y + this.ball.height >= this.paddle.y) {
					this.ball.x = (this.paddle.x - this.ball.width);
					this.ball.moveX = DIRECTION.LEFT;

					beep1.play();
				}
			}
		}

		// Handle the end of round transition
		// Check to see if the player won the round.
		if (this.player.score === rounds[this.round]) {
			// Check to see if there are any more rounds/levels left and display the victory screen if
			// there are not.
			if (!rounds[this.round + 1]) {
				this.over = true;
				setTimeout(function () { Pong.endGameMenu('Winner!'); }, 1000);
			} else {
				// If there is another round, reset all the values and increment the round number.
				this.color = this._generateRoundColor();
				this.player.score = this.paddle.score = 0;
				this.player.speed += 0.5;
				this.paddle.speed += 1;
				this.ball.speed += 1;
				this.round += 1;

				beep3.play();
			}
		}
		// Check to see if the paddle/AI has won the round.
		else if (this.paddle.score === rounds[this.round]) {
			this.over = true;
			setTimeout(function () { Pong.endGameMenu('Game Over!'); }, 1000);
		}
	},

	// Draw the objects to the canvas element
	draw: function () {
		// Clear the Canvas
		this.context.clearRect(
			0,
			0,
			this.canvas.width,
			this.canvas.height
		);

		// Set the fill style to black
		this.context.fillStyle = this.color;

		// Draw the background
		this.context.fillRect(
			0,
			0,
			this.canvas.width,
			this.canvas.height
		);

		// Set the fill style to white (For the paddles and the ball)
		this.context.fillStyle = '#ffffff';

		// Draw the Player
		this.context.fillRect(
			this.player.x,
			this.player.y,
			this.player.width,
			this.player.height
		);

		// Draw the Paddle
		this.context.fillRect(
			this.paddle.x,
			this.paddle.y,
			this.paddle.width,
			this.paddle.height
		);

		// Draw the Ball
		if (Pong._turnDelayIsOver.call(this)) {
			this.context.fillRect(
				this.ball.x,
				this.ball.y,
				this.ball.width,
				this.ball.height
			);
		}

		// Draw the net (Line in the middle)
		this.context.beginPath();
		this.context.setLineDash([7, 15]);
		this.context.moveTo((this.canvas.width / 2), this.canvas.height - 140);
		this.context.lineTo((this.canvas.width / 2), 140);
		this.context.lineWidth = 10;
		this.context.strokeStyle = '#ffffff';
		this.context.stroke();

		// Set the default canvas font and align it to the center
		this.context.font = '100px Courier New';
		this.context.textAlign = 'center';

		// Draw the players score (left)
		this.context.fillText(
			this.player.score.toString(),
			(this.canvas.width / 2) - 300,
			200
		);

		// Draw the paddles score (right)
		this.context.fillText(
			this.paddle.score.toString(),
			(this.canvas.width / 2) + 300,
			200
		);

		// Change the font size for the center score text
		this.context.font = '30px Courier New';

		// Draw the winning score (center)
		this.context.fillText(
			'Round ' + (Pong.round + 1),
			(this.canvas.width / 2),
			35
		);

		// Change the font size for the center score value
		this.context.font = '40px Courier';

		// Draw the current round number
		this.context.fillText(
			rounds[Pong.round] ? rounds[Pong.round] : rounds[Pong.round - 1],
			(this.canvas.width / 2),
			100
		);
	},

	loop: function () {
		Pong.update();
		Pong.draw();

		// If the game is not over, draw the next frame.
		if (!Pong.over) requestAnimationFrame(Pong.loop);
	},

	listen: function () {
		document.addEventListener('keydown', function (key) {
			// Handle the 'Press any key to begin' function and start the game.
			if (Pong.running === false) {
				Pong.running = true;
				window.requestAnimationFrame(Pong.loop);
			}

			// Handle up arrow and w key events
			if (key.keyCode === 38 || key.keyCode === 87) Pong.player.move = DIRECTION.UP;

			// Handle down arrow and s key events
			if (key.keyCode === 40 || key.keyCode === 83) Pong.player.move = DIRECTION.DOWN;
		});

		// Stop the player from moving when there are no keys being pressed.
		document.addEventListener('keyup', function (key) { Pong.player.move = DIRECTION.IDLE; });
	},

	// Reset the ball location, the player turns and set a delay before the next round begins.
	_resetTurn: function(victor, loser) {
		this.ball = Ball.new.call(this, this.ball.speed);
		this.turn = loser;
		this.timer = (new Date()).getTime();

		victor.score++;
		beep2.play();
	},

	// Wait for a delay to have passed after each turn.
	_turnDelayIsOver: function() {
		return ((new Date()).getTime() - this.timer >= 1000);
	},

	// Select a random color as the background of each level/round.
	_generateRoundColor: function () {
		var newColor = colors[Math.floor(Math.random() * colors.length)];
		if (newColor === this.color) return Pong._generateRoundColor();
		return newColor;
	}
};

var Pong = Object.assign({}, Game);
Pong.initialize();

برای مشاهده نسخه عملیاتی این پروژه به این صفحه (+) مراجعه کنید.

پروژه نهم: ساخت بازی کارت‌های جفت با جاوا اسکریپت

راهنمای پروژه محور جاوا اسکریپت

کدنویسی یک بازی تطبیق حافظه در جاوا اسکریپت نیز ایده سرگرم‌کننده‌ای برای یک پروژه آموزشی محسوب می‌شود، پس در ادامه مقاله آموزش جاوا اسکریپت پروژه محور به آن خواهیم پرداخت. منطق این بازی ساده است:

  1. تعداد مشخصی کارت روی میز هست و ما پشت کارت‌ها را می‌بینیم.
  2. بازیکن باید همه کارت‌های جفت را پیدا کند.

با استفاده از محدودسازی تعداد دفعات حدس یا تعیین محدودیت زمانی برای بازی، می‌توان آن را هیجان‌انگیزتر ساخت. این نیز یک پروژه عالی نه تنها برای تمرین مهارت‌های جاوا اسکریپت، بلکه ‌برای تمرین کدنویسی HTML و CSS محسوب می‌شود. آسان‌ترین روش برای ایجاد کارت‌های مطابق هم این است که رنگ‌های مختلفی روی آنها قرار دهیم تا بازیکن این رنگ‌ها را با هم تطبیق دهد. اما می‌توان از تصاویر آیکون‌ها و اعداد نیز به این منظور بهره جست.

  • فایل HTML توسعه بازی کارت‌های جفت با جاوا اسکریپت
<div class="wrapper">
  <h1>JavaScript pairs Game</h1>
  <h3>Click any card to begin</h3>
  <p><span id="seconds">00</span>:<span id="tens">00</span></p>
  <p id ="text"></p>
  <div id="container">

  </div>
</div>
  • فایل CSS کدنویسی بازی کارت‌های جفت با جاوا اسکریپت
/* Variabes */  
$orange: #ffa600;
$green: #c1d72e;
$blue: #82d2e5;
$grey: #f3f3f3;
$white: #fff;
$base-color:$blue ;


/* Mixin's */  
@mixin transition {
  -webkit-transition: all 0.5s ease-in-out;
  -moz-transition: all 0.5s ease-in-out;
  transition: all 0.5s ease-in-out;
}

@mixin corners ($radius) {
  -moz-border-radius: $radius;
  -webkit-border-radius: $radius;
  border-radius: $radius; 
  -khtml-border-radius: $radius; 
}

body {
  background:$base-color;
  font-family: "HelveticaNeue-Light", "Helvetica Neue Light", "Helvetica Neue", Helvetica, Arial, "Lucida Grande", sans-serif; 
  height:100%;
  color: $white;
  text-align: center;
}


h1, h2 {
  font-family: 'Roboto', sans-serif;
  font-weight: 100;
  font-size: 2.6em;
  text-transform: uppercase;
}

h3 {
  font-family: 'Roboto', sans-serif;
  font-weight: 100;
  font-size: 1.4em;
  text-transform: uppercase;
}

#seconds, #tens{
  font-size:2em;
}

button{
  @include corners (5px);
  background:$base-color;
  color:$white;
  border: solid 1px $white;
  text-decoration:none;
  cursor:pointer;
  font-size:1.2em;
  padding:18px 10px;
  width:180px;
  margin: 10px;
  outline: none;
 
    &:hover {
    	@include transition;
    	background:$white;
    	border: solid 1px $white;
    	color:$base-color;
  	}
    
}


#container {
  width: 630px;
  margin: 10px auto;

  &:after {
    content: "";
    display: table;
    clear: both;
  }
  
}

[data-view="card"] {
  transform: rotateY(180deg);
  width: 100px;
  height: 140px;
  border: solid 1px #d3cece;
  border-radius: 5px;
  float: left;
  margin: 10px;
  cursor: pointer;
  background:
  linear-gradient(135deg, $grey 22px, $white 22px, $white 24px, transparent 24px, transparent 67px, $white 67px, $white 69px, transparent 69px),
  linear-gradient(225deg, $grey 22px, $white 22px, $white 24px, transparent 24px, transparent 67px, $white 67px, $white 69px, transparent 69px)0 64px;
  background-color: $grey;
  background-size: 64px 128px
}

.flipped {
  transition: 0.6s;
	transform-style: preserve-3d;
  position: relative;
	transform: rotateY(0deg);
}

.reverse {
  transition: 0.6s;
	transform-style: preserve-3d;
  position: relative;
	transform: rotateY(180deg);
}

.correct {
  opacity: .5;
  cursor: default;
	transform-style: preserve-3d;
  position: relative;
	transform: rotateY(0deg);
}

/* Icons */
$cards: sass, gulp, grunt, git, css3;
       
@each $card in $cards  {

  .correct[data-item="#{$card}"],
  .flipped[data-item="#{$card}"]{
    background:url("https://cathydutton.co.uk/assets/img/#{$card}.png") left center no-repeat $white;
    background-size: contain;
  }

}


  • فایل جاوا اسکریپت پروژه کدنویسی بازی کارت‌های جفت با جاوا اسکریپت
var myCards = document.getElementById('container');
var resultsArray = [];
var counter = 0;
var text = document.getElementById('text');
var seconds = 00; 
var tens = 00; 
var appendTens = document.getElementById("tens");
var appendSeconds = document.getElementById("seconds");
var Interval ;
var images = [
  'sass', 
  'git', 
  'gulp', 
  'css3', 
  'grunt'
];

var clone = images.slice(0); // duplicate array
var cards = images.concat(clone); // merge to arrays 

// Shufffel function
function shuffle(o){
  for(var j, x, i = o.length; i; j = Math.floor(Math.random() * i), x = o[--i],   o[i] = o[j], o[j] = x);
  return o;
}
shuffle(cards);

for (var i = 0; i < cards.length; i++) {
  card = document.createElement('div');
  card.dataset.item = cards[i];
  card.dataset.view = "card";
  myCards.appendChild(card);
     
  card.onclick = function () {
   
    if (this.className != 'flipped' && this.className != 'correct'){
        this.className = 'flipped';
        var result = this.dataset.item;
        resultsArray.push(result);
        clearInterval(Interval);
        Interval = setInterval(startTimer, 10);
    }
  
    if (resultsArray.length > 1) {

      if (resultsArray[0] === resultsArray[1]) {
        check("correct");
        counter ++;
        win();
        resultsArray = [];
      } else {
        check("reverse");
        resultsArray = [];
      }
      
    }
    
  }
   
};


var check = function(className) {
  
  var x = document.getElementsByClassName("flipped");
  setTimeout(function() {

    for(var i = (x.length - 1); i >= 0; i--) {
      x[i].className = className;
    }
     
  },500);
   
}

var win = function () {

  if(counter === 5) {
    clearInterval(Interval);
    text.innerHTML = "Your time was " + seconds + ":" + tens;
  } 
  
}
     
function startTimer () {
  tens++; 
    
  if(tens < 9){
    appendTens.innerHTML = "0" + tens;
  }
    
  if (tens > 9){
    appendTens.innerHTML = tens;
      
  } 
    
  if (tens > 99) {
    seconds++;
    appendSeconds.innerHTML = "0" + seconds;
    tens = 0;
    appendTens.innerHTML = "0" + 0;
  }
    
  if (seconds > 9){
    appendSeconds.innerHTML = seconds;
  }
  
}

برای مشاهده نسخه عملیاتی این پروژه به این صفحه (+) مراجعه کنید.

پروژه دهم: ساخت بازی MAZE با جاوا اسکریپت

راهنمای پروژه محور جاوا اسکریپت

کدنویسی بازی MAZE نیز یک ایده عالی برای یک پروژه آموزش کدنویسی مفرح محسوب می‌شود. با این حال این پروژه برخی دشواری‌های خاص خود را نیز دارد. از این رو اگر به تازگی کار با جاوا اسکریپت را آغاز کرده‌اید باید مطمئن شوید که به قدر کافی در این زبان مهارت کسب کرده‌اید تا بتوانید شروع به ساخت این بازی بکنید. آموزش جاوا اسکریپت پروژه محور را با کدهای بازی MAZE ادامه می‌دهیم.

  • فایل HTML توسعه بازی MAZE با جاوا اسکریپت
<html lang="en-GB">
<head>
  <meta charset="utf-8">
  <body>
    <div id="gradient"></div>
    <div id="page">
      <div id="Message-Container">
        <div id="message">
          <h1>Congratulations!</h1>
          <p>You are done.</p>
          <p id="moves"></p>
          <input id="okBtn" type="button" onclick="toggleVisablity('Message-Container')" value="Cool!" />
        </div>
      </div>
      <div id="menu">
        <div class="custom-select">
          <select id="diffSelect">
                    <option value="10">Easy</option>
                    <option value="15">Medium</option>
                    <option value="25">Hard</option>
                    <option value="38">Extreme</option>                                      
                </select>
        </div>
        <input id="startMazeBtn" type="button" onclick="makeMaze()" value="Start" />
      </div>
      <div id="view">
        <div id="mazeContainer">
          <canvas id="mazeCanvas" class="border" height="1100" width="1100"></canvas>
        </div>
      </div>
    </div>
    <script type="text/javascript" src="https://cdnjs.cloudflare.com/ajax/libs/jquery/3.3.1/jquery.min.js"></script>
    <script type="text/javascript" src="https://cdnjs.cloudflare.com/ajax/libs/jquery.touchswipe/1.6.18/jquery.touchSwipe.min.js"></script>
  </body>
</html>
  • فایل CSS کدنویسی بازی MAZE با جاوا اسکریپت
$menuHeight: 65px+10px;
@mixin transition {
    transition-property: background-color opacity;
    transition-duration: 0.2s;
    transition-timing-function: ease-in-out;
}

html,
body {
    width: 100vw;
    height: 100vh;
    position: fixed;
    padding: 0;
    margin: 0;
    top: 0;
    bottom: 0;
    left: 0;
    right: 0;
}

#mazeContainer {
    transition-property: opacity;
    transition-duration: 1s;
    transition-timing-function: linear;
    top: $menuHeight;
    opacity: 0;
    display: inline-block;
    background-color: rgba(0, 0, 0, 0.30);
    margin: auto;

    #mazeCanvas {
        margin: 0;
        display: block;
        border: solid 1px black;
    }
}

input,
select {
    @include transition;
    cursor: pointer;
    background-color: rgba(0, 0, 0, 0.30);
    height: 45px;
    width: 150px;
    padding: 10px;
    border: none;
    border-radius: 5px;
    color: white;
    display: inline-block;
    font-size: 15px;
    text-align: center;
    text-decoration: none;
    appearance: none;
    &:hover {
        background-color: rgba(0, 0, 0, 0.70);
    }
    &:active {
        background-color: black;
    }
    &:focus {
        outline: none;
    }
}


.custom-select {
    display: inline-block;
    select {
        -webkit-appearance: none;
        -moz-appearance: none;
        appearance: none;
        background-image: url('data:image/png;base64,iVBORw0KGgoAAAANSUhEUgAAABAAAAAQCAYAAAAf8/9hAAAAh0lEQVQ4T93TMQrCUAzG8V9x8QziiYSuXdzFC7h4AcELOPQAdXYovZCHEATlgQV5GFTe1ozJlz/kS1IpjKqw3wQBVyy++JI0y1GTe7DCBbMAckeNIQKk/BanALBB+16LtnDELoMcsM/BESDlz2heDR3WePwKSLo5eoxz3z6NNcFD+vu3ij14Aqz/DxGbKB7CAAAAAElFTkSuQmCC');
        background-repeat: no-repeat;
        background-position: 125px center;
    }
}

#Message-Container {
    visibility: hidden;
    color: white;
    display: block;
    width: 100vw;
    height: 100vh;
    position: fixed;
    top: 0;
    left: 0;
    bottom: 0;
    right: 0;
    background-color: rgba(0, 0, 0, 0.30);
    z-index: 1;
    #message {
        width: 300px;
        height: 300px;
        position: fixed;
        top: 50%;
        left: 50%;
        margin-left: -150px;
        margin-top: -150px;
    }
}

#page {
    font-family: "Segoe UI", Arial, sans-serif;
    text-align: center;
    height: auto;
    width: auto;
    margin: auto;
    #menu {
        margin: auto;
        padding: 10px;
        height: 65px;
        box-sizing: border-box;
        h1 {
            margin: 0;
            margin-bottom: 10px;
            font-weight: 600;
            font-size: 3.2rem;
        }
    }
    #view {
        position: absolute;
        top:65px;
        bottom: 0;
        left: 0;
        right: 0;
        width: 100%;
        height: auto;
           
    }
}

.border {
    border: 1px black solid;
    border-radius: 5px;
}


#gradient {
    z-index: -1;
    position: fixed;
    top: 0;
    bottom: 0;
    width: 100vw;
    height: 100vh;
    color: #fff;
    background: linear-gradient(-45deg, #EE7752, #E73C7E, #23A6D5, #23D5AB);
    background-size: 400% 400%;
    animation: Gradient 15s ease infinite;
}

@keyframes Gradient {
    0% {
        background-position: 0% 50%
    }
    50% {
        background-position: 100% 50%
    }
    100% {
        background-position: 0% 50%
    }
}

 /* Extra small devices (phones, 600px and down) */
 @media only screen and (max-width: 400px) {
     input, select{
         width: 120px;
     }
 }
  • فایل جاوا اسکریپت پروژه ساخت بازی MAZE با جاوا اسکریپت
function rand(max) {
  return Math.floor(Math.random() * max);
}

function shuffle(a) {
  for (let i = a.length - 1; i > 0; i--) {
    const j = Math.floor(Math.random() * (i + 1));
    [a[i], a[j]] = [a[j], a[i]];
  }
  return a;
}

function changeBrightness(factor, sprite) {
  var virtCanvas = document.createElement("canvas");
  virtCanvas.width = 500;
  virtCanvas.height = 500;
  var context = virtCanvas.getContext("2d");
  context.drawImage(sprite, 0, 0, 500, 500);

  var imgData = context.getImageData(0, 0, 500, 500);

  for (let i = 0; i < imgData.data.length; i += 4) {
    imgData.data[i] = imgData.data[i] * factor;
    imgData.data[i + 1] = imgData.data[i + 1] * factor;
    imgData.data[i + 2] = imgData.data[i + 2] * factor;
  }
  context.putImageData(imgData, 0, 0);

  var spriteOutput = new Image();
  spriteOutput.src = virtCanvas.toDataURL();
  virtCanvas.remove();
  return spriteOutput;
}

function displayVictoryMess(moves) {
  document.getElementById("moves").innerHTML = "You Moved " + moves + " Steps.";
  toggleVisablity("Message-Container");  
}

function toggleVisablity(id) {
  if (document.getElementById(id).style.visibility == "visible") {
    document.getElementById(id).style.visibility = "hidden";
  } else {
    document.getElementById(id).style.visibility = "visible";
  }
}

function Maze(Width, Height) {
  var mazeMap;
  var width = Width;
  var height = Height;
  var startCoord, endCoord;
  var dirs = ["n", "s", "e", "w"];
  var modDir = {
    n: {
      y: -1,
      x: 0,
      o: "s"
    },
    s: {
      y: 1,
      x: 0,
      o: "n"
    },
    e: {
      y: 0,
      x: 1,
      o: "w"
    },
    w: {
      y: 0,
      x: -1,
      o: "e"
    }
  };

  this.map = function() {
    return mazeMap;
  };
  this.startCoord = function() {
    return startCoord;
  };
  this.endCoord = function() {
    return endCoord;
  };

  function genMap() {
    mazeMap = new Array(height);
    for (y = 0; y < height; y++) {
      mazeMap[y] = new Array(width);
      for (x = 0; x < width; ++x) {
        mazeMap[y][x] = {
          n: false,
          s: false,
          e: false,
          w: false,
          visited: false,
          priorPos: null
        };
      }
    }
  }

  function defineMaze() {
    var isComp = false;
    var move = false;
    var cellsVisited = 1;
    var numLoops = 0;
    var maxLoops = 0;
    var pos = {
      x: 0,
      y: 0
    };
    var numCells = width * height;
    while (!isComp) {
      move = false;
      mazeMap[pos.x][pos.y].visited = true;

      if (numLoops >= maxLoops) {
        shuffle(dirs);
        maxLoops = Math.round(rand(height / 8));
        numLoops = 0;
      }
      numLoops++;
      for (index = 0; index < dirs.length; index++) {
        var direction = dirs[index];
        var nx = pos.x + modDir[direction].x;
        var ny = pos.y + modDir[direction].y;

        if (nx >= 0 && nx < width && ny >= 0 && ny < height) {
          //Check if the tile is already visited
          if (!mazeMap[nx][ny].visited) {
            //Carve through walls from this tile to next
            mazeMap[pos.x][pos.y][direction] = true;
            mazeMap[nx][ny][modDir[direction].o] = true;

            //Set Currentcell as next cells Prior visited
            mazeMap[nx][ny].priorPos = pos;
            //Update Cell position to newly visited location
            pos = {
              x: nx,
              y: ny
            };
            cellsVisited++;
            //Recursively call this method on the next tile
            move = true;
            break;
          }
        }
      }

      if (!move) {
        //  If it failed to find a direction,
        //  move the current position back to the prior cell and Recall the method.
        pos = mazeMap[pos.x][pos.y].priorPos;
      }
      if (numCells == cellsVisited) {
        isComp = true;
      }
    }
  }

  function defineStartEnd() {
    switch (rand(4)) {
      case 0:
        startCoord = {
          x: 0,
          y: 0
        };
        endCoord = {
          x: height - 1,
          y: width - 1
        };
        break;
      case 1:
        startCoord = {
          x: 0,
          y: width - 1
        };
        endCoord = {
          x: height - 1,
          y: 0
        };
        break;
      case 2:
        startCoord = {
          x: height - 1,
          y: 0
        };
        endCoord = {
          x: 0,
          y: width - 1
        };
        break;
      case 3:
        startCoord = {
          x: height - 1,
          y: width - 1
        };
        endCoord = {
          x: 0,
          y: 0
        };
        break;
    }
  }

  genMap();
  defineStartEnd();
  defineMaze();
}

function DrawMaze(Maze, ctx, cellsize, endSprite = null) {
  var map = Maze.map();
  var cellSize = cellsize;
  var drawEndMethod;
  ctx.lineWidth = cellSize / 40;

  this.redrawMaze = function(size) {
    cellSize = size;
    ctx.lineWidth = cellSize / 50;
    drawMap();
    drawEndMethod();
  };

  function drawCell(xCord, yCord, cell) {
    var x = xCord * cellSize;
    var y = yCord * cellSize;

    if (cell.n == false) {
      ctx.beginPath();
      ctx.moveTo(x, y);
      ctx.lineTo(x + cellSize, y);
      ctx.stroke();
    }
    if (cell.s === false) {
      ctx.beginPath();
      ctx.moveTo(x, y + cellSize);
      ctx.lineTo(x + cellSize, y + cellSize);
      ctx.stroke();
    }
    if (cell.e === false) {
      ctx.beginPath();
      ctx.moveTo(x + cellSize, y);
      ctx.lineTo(x + cellSize, y + cellSize);
      ctx.stroke();
    }
    if (cell.w === false) {
      ctx.beginPath();
      ctx.moveTo(x, y);
      ctx.lineTo(x, y + cellSize);
      ctx.stroke();
    }
  }

  function drawMap() {
    for (x = 0; x < map.length; x++) {
      for (y = 0; y < map[x].length; y++) {
        drawCell(x, y, map[x][y]);
      }
    }
  }

  function drawEndFlag() {
    var coord = Maze.endCoord();
    var gridSize = 4;
    var fraction = cellSize / gridSize - 2;
    var colorSwap = true;
    for (let y = 0; y < gridSize; y++) {
      if (gridSize % 2 == 0) {
        colorSwap = !colorSwap;
      }
      for (let x = 0; x < gridSize; x++) {
        ctx.beginPath();
        ctx.rect(
          coord.x * cellSize + x * fraction + 4.5,
          coord.y * cellSize + y * fraction + 4.5,
          fraction,
          fraction
        );
        if (colorSwap) {
          ctx.fillStyle = "rgba(0, 0, 0, 0.8)";
        } else {
          ctx.fillStyle = "rgba(255, 255, 255, 0.8)";
        }
        ctx.fill();
        colorSwap = !colorSwap;
      }
    }
  }

  function drawEndSprite() {
    var offsetLeft = cellSize / 50;
    var offsetRight = cellSize / 25;
    var coord = Maze.endCoord();
    ctx.drawImage(
      endSprite,
      2,
      2,
      endSprite.width,
      endSprite.height,
      coord.x * cellSize + offsetLeft,
      coord.y * cellSize + offsetLeft,
      cellSize - offsetRight,
      cellSize - offsetRight
    );
  }

  function clear() {
    var canvasSize = cellSize * map.length;
    ctx.clearRect(0, 0, canvasSize, canvasSize);
  }

  if (endSprite != null) {
    drawEndMethod = drawEndSprite;
  } else {
    drawEndMethod = drawEndFlag;
  }
  clear();
  drawMap();
  drawEndMethod();
}

function Player(maze, c, _cellsize, onComplete, sprite = null) {
  var ctx = c.getContext("2d");
  var drawSprite;
  var moves = 0;
  drawSprite = drawSpriteCircle;
  if (sprite != null) {
    drawSprite = drawSpriteImg;
  }
  var player = this;
  var map = maze.map();
  var cellCoords = {
    x: maze.startCoord().x,
    y: maze.startCoord().y
  };
  var cellSize = _cellsize;
  var halfCellSize = cellSize / 2;

  this.redrawPlayer = function(_cellsize) {
    cellSize = _cellsize;
    drawSpriteImg(cellCoords);
  };

  function drawSpriteCircle(coord) {
    ctx.beginPath();
    ctx.fillStyle = "yellow";
    ctx.arc(
      (coord.x + 1) * cellSize - halfCellSize,
      (coord.y + 1) * cellSize - halfCellSize,
      halfCellSize - 2,
      0,
      2 * Math.PI
    );
    ctx.fill();
    if (coord.x === maze.endCoord().x && coord.y === maze.endCoord().y) {
      onComplete(moves);
      player.unbindKeyDown();
    }
  }

  function drawSpriteImg(coord) {
    var offsetLeft = cellSize / 50;
    var offsetRight = cellSize / 25;
    ctx.drawImage(
      sprite,
      0,
      0,
      sprite.width,
      sprite.height,
      coord.x * cellSize + offsetLeft,
      coord.y * cellSize + offsetLeft,
      cellSize - offsetRight,
      cellSize - offsetRight
    );
    if (coord.x === maze.endCoord().x && coord.y === maze.endCoord().y) {
      onComplete(moves);
      player.unbindKeyDown();
    }
  }

  function removeSprite(coord) {
    var offsetLeft = cellSize / 50;
    var offsetRight = cellSize / 25;
    ctx.clearRect(
      coord.x * cellSize + offsetLeft,
      coord.y * cellSize + offsetLeft,
      cellSize - offsetRight,
      cellSize - offsetRight
    );
  }

  function check(e) {
    var cell = map[cellCoords.x][cellCoords.y];
    moves++;
    switch (e.keyCode) {
      case 65:
      case 37: // west
        if (cell.w == true) {
          removeSprite(cellCoords);
          cellCoords = {
            x: cellCoords.x - 1,
            y: cellCoords.y
          };
          drawSprite(cellCoords);
        }
        break;
      case 87:
      case 38: // north
        if (cell.n == true) {
          removeSprite(cellCoords);
          cellCoords = {
            x: cellCoords.x,
            y: cellCoords.y - 1
          };
          drawSprite(cellCoords);
        }
        break;
      case 68:
      case 39: // east
        if (cell.e == true) {
          removeSprite(cellCoords);
          cellCoords = {
            x: cellCoords.x + 1,
            y: cellCoords.y
          };
          drawSprite(cellCoords);
        }
        break;
      case 83:
      case 40: // south
        if (cell.s == true) {
          removeSprite(cellCoords);
          cellCoords = {
            x: cellCoords.x,
            y: cellCoords.y + 1
          };
          drawSprite(cellCoords);
        }
        break;
    }
  }

  this.bindKeyDown = function() {
    window.addEventListener("keydown", check, false);

    $("#view").swipe({
      swipe: function(
        event,
        direction,
        distance,
        duration,
        fingerCount,
        fingerData
      ) {
        console.log(direction);
        switch (direction) {
          case "up":
            check({
              keyCode: 38
            });
            break;
          case "down":
            check({
              keyCode: 40
            });
            break;
          case "left":
            check({
              keyCode: 37
            });
            break;
          case "right":
            check({
              keyCode: 39
            });
            break;
        }
      },
      threshold: 0
    });
  };

  this.unbindKeyDown = function() {
    window.removeEventListener("keydown", check, false);
    $("#view").swipe("destroy");
  };

  drawSprite(maze.startCoord());

  this.bindKeyDown();
}

var mazeCanvas = document.getElementById("mazeCanvas");
var ctx = mazeCanvas.getContext("2d");
var sprite;
var finishSprite;
var maze, draw, player;
var cellSize;
var difficulty;
// sprite.src = 'media/sprite.png';

window.onload = function() {
  let viewWidth = $("#view").width();
  let viewHeight = $("#view").height();
  if (viewHeight < viewWidth) {
    ctx.canvas.width = viewHeight - viewHeight / 100;
    ctx.canvas.height = viewHeight - viewHeight / 100;
  } else {
    ctx.canvas.width = viewWidth - viewWidth / 100;
    ctx.canvas.height = viewWidth - viewWidth / 100;
  }

  //Load and edit sprites
  var completeOne = false;
  var completeTwo = false;
  var isComplete = () => {
    if(completeOne === true && completeTwo === true)
       {
         console.log("Runs");
         setTimeout(function(){
           makeMaze();
         }, 500);         
       }
  };
  sprite = new Image();
  sprite.src =
    "https://image.ibb.co/dr1HZy/Pf_RWr3_X_Imgur.png" +
    "?" +
    new Date().getTime();
  sprite.setAttribute("crossOrigin", " ");
  sprite.onload = function() {
    sprite = changeBrightness(1.2, sprite);
    completeOne = true;
    console.log(completeOne);
    isComplete();
  };

  finishSprite = new Image();
  finishSprite.src = "https://image.ibb.co/b9wqnJ/i_Q7m_U25_Imgur.png"+
  "?" +
  new Date().getTime();
  finishSprite.setAttribute("crossOrigin", " ");
  finishSprite.onload = function() {
    finishSprite = changeBrightness(1.1, finishSprite);
    completeTwo = true;
    console.log(completeTwo);
    isComplete();
  };
  
};

window.onresize = function() {
  let viewWidth = $("#view").width();
  let viewHeight = $("#view").height();
  if (viewHeight < viewWidth) {
    ctx.canvas.width = viewHeight - viewHeight / 100;
    ctx.canvas.height = viewHeight - viewHeight / 100;
  } else {
    ctx.canvas.width = viewWidth - viewWidth / 100;
    ctx.canvas.height = viewWidth - viewWidth / 100;
  }
  cellSize = mazeCanvas.width / difficulty;
  if (player != null) {
    draw.redrawMaze(cellSize);
    player.redrawPlayer(cellSize);
  }
};

function makeMaze() {
  //document.getElementById("mazeCanvas").classList.add("border");
  if (player != undefined) {
    player.unbindKeyDown();
    player = null;
  }
  var e = document.getElementById("diffSelect");
  difficulty = e.options[e.selectedIndex].value;
  cellSize = mazeCanvas.width / difficulty;
  maze = new Maze(difficulty, difficulty);
  draw = new DrawMaze(maze, ctx, cellSize, finishSprite);
  player = new Player(maze, mazeCanvas, cellSize, displayVictoryMess, sprite);
  if (document.getElementById("mazeContainer").style.opacity < "100") {
    document.getElementById("mazeContainer").style.opacity = "100";
  }
}

برای مشاهده نسخه نهایی این بازی به این صفحه (+) مراجعه کنید.

پروژه یازدهم: ساخت محاسبه‌گر انعام با جاوا اسکریپت

راهنمای پروژه محور جاوا اسکریپت

گاهی اوقات، به خصوص اگر یک روز طولانی کدنویسی کرده باشید، محاسبه انعام به کاری دشوار تبدیل می‌شود. اگر می‌خواهید مشکل محاسبه انعام به صورت دستی را حل کنید، می‌توانید یک اپلیکیشن محاسبه‌گر انعام با جاوا اسکریپت برای خود بنویسید تا هر زمان که نیاز داشتید از آن استفاده کنید. به علاوه این ابزار موجب می‌شود مشکل اشتباه یا خطا در محاسبات از بین برود.

زمانی که یک محاسبه‌گر ساده انعام ایجاد می‌کنید، همواره می‌توانید قابلیت‌های بیشتری برای افزایش کاربرپسندی آن اضافه کنید. فرض کنید می‌خواهید به خارج از کشور سفر کنید. می‌توانید سطح مناسب انعام را در کشور مقصد به دست آورده و به عنوان یک گزینه به اپلیکیشن خود اضافه کنید.

  • فایل HTML توسعه محاسبه‌گر انعام با جاوا اسکریپت
<!doctype html>
<html lang="en">
  <head>
    <title>Tip Calculator</title>
    <!-- Required meta tags -->
    <meta charset="utf-8">
    <meta name="viewport" content="width=device-width, initial-scale=1, shrink-to-fit=no">

    <!-- Bootstrap CSS -->
    <link rel="stylesheet" href="https://maxcdn.bootstrapcdn.com/bootstrap/4.0.0-beta.2/css/bootstrap.min.css" integrity="sha384-PsH8R72JQ3SOdhVi3uxftmaW6Vc51MKb0q5P2rRUpPvrszuE4W1povHYgTpBfshb" crossorigin="anonymous">

  </head>
  <body class="bg-dark">
    <div class="container">
      <div class="row">
        <div class="col-md-6 mx-auto">
          <div class="card card-body text-center mt-5">
            <h1 class="heading display-5 pb-3">Tip Calculator</h1>
            <form id="tip-form">
              <div class="form-group">
                <div class="input-group">
                  <span class="input-group-addon">$</span>
                  <input type="number" class="form-control" id="billTotal" placeholder="Total Bill">
                </div>
              </div>
              <div class="form-group tipPersent">
                <div class="input-group">
                  <label for="">Tip:</label>


                  <input type="range" class="form-control" id="tipInput" value="0">
                  <span class="input-group-addon" id="tipOutput"></span>
                </div>
              </div>


            </form>
            <hr>

            <!-- RESULTS -->
            <div id="results" class="pt-4">
              <h5>Results</h5>
              <div class="form-group">
                <div class="input-group">
                  <span class="input-group-addon">Tip amount</span>
                  <input type="number" class="form-control" id="tipAmount" disabled>
                </div>
              </div>

              <div class="form-group">
                <div class="input-group">
                  <span class="input-group-addon">Total Bill with Tip</span>
                  <input type="number" class="form-control" id="totalBillWithTip" disabled>
                </div>
              </div>


            </div>
          </div>
        </div>
      </div>
    </div>

    <!-- Optional JavaScript -->
    <!-- jQuery first, then Popper.js, then Bootstrap JS -->
    <script src="https://code.jquery.com/jquery-3.2.1.slim.min.js" integrity="sha384-KJ3o2DKtIkvYIK3UENzmM7KCkRr/rE9/Qpg6aAZGJwFDMVNA/GpGFF93hXpG5KkN" crossorigin="anonymous"></script>
    <script src="https://cdnjs.cloudflare.com/ajax/libs/popper.js/1.12.3/umd/popper.min.js" integrity="sha384-vFJXuSJphROIrBnz7yo7oB41mKfc8JzQZiCq4NCceLEaO4IHwicKwpJf9c9IpFgh" crossorigin="anonymous"></script>
    <script src="https://maxcdn.bootstrapcdn.com/bootstrap/4.0.0-beta.2/js/bootstrap.min.js" integrity="sha384-alpBpkh1PFOepccYVYDB4do5UnbKysX5WZXm3XxPqe5iKTfUKjNkCk9SaVuEZflJ" crossorigin="anonymous"></script>
   
  </body>
</html>
  • فایل CSS ساخت محاسبه‌گر انعام با جاوا اسکریپت
  #results {
         display:none;
       }
  • فایل جاوا اسکریپت پروژه کدنویسی محاسبه‌گر انعام با جاوا اسکریپت
document.querySelector('#tip-form').onchange = function(){

  var bill = Number(document.getElementById('billTotal').value);
  var tip = document.getElementById('tipInput').value;
  document.getElementById('tipOutput').innerHTML = `${tip}%`;
  var tipValue = bill * (tip/100)
  var finalBill = bill + tipValue
console.log(finalBill)
var tipAmount = document.querySelector('#tipAmount')
var totalBillWithTip = document.querySelector('#totalBillWithTip')

tipAmount.value = tipValue.toFixed(2);
 totalBillWithTip.value =finalBill.toFixed(2);

 //Show Results

  document.getElementById('results').style.display='block'
}

برای مشاهده نسخه عملیاتی پروژه یازدهم از آموزش جاوا اسکریپت پروژه محور به این صفحه (+) مراجعه کنید.

پروژه دوازدهم: بررسی PALINDROME با جاوا اسکریپت

PALINDROME یا «جناس قلب» به عبارت یا کلمه‌ای گفته می‌شود که هم از اول به آخر و هم از آخر به اول به طرز یکسانی خوانده می‌شود. ساخت یک بررسی‌‌کننده پالیندروم ایده‌ای عالی برای کار با رشته‌ها و دست‌کاری آن‌ها با جاوا اسکریپت محسوب می‌شود. به علاوه، بررسی پالیندورم سرگرمی بسیار مفرحی نیز محسوب شود. آموزش جاوا اسکریپت پروژه محور را با همین موضوع ادامه می‌دهیم.

  • فایل HTML بررسی PALINDROME با جاوا اسکریپت
<h2>Javascript Palindrome Checking Function</h2>
  • فایل CSS بررسی PALINDROME با جاوا اسکریپت
div{margin-top:20px;}
  • فایل جاوا اسکریپت پروژه بررسی PALINDROME با جاوا اسکریپت
function palindrome(myString){

/* remove special characters, spaces and make lowercase*/
var removeChar = myString.replace(/[^A-Z0-9]/ig, "").toLowerCase();

/* reverse removeChar for comparison*/
var checkPalindrome = removeChar.split('').reverse().join('');

/* Check to see if myString is a Palindrome*/
if(removeChar === checkPalindrome){
  
  document.write("<div>"+ myString + " is a Palindrome <div>");
}else{
  
  document.write("<div>" + myString + " is not a Palindrome </div>");
}
}
palindrome('"Oh who was it I saw, oh who?"')
palindrome('"Madam"')
palindrome('"Star Wars"')
palindrome('"2,3,4,3,2"')
palindrome('"7,10,7,8,9"')

برای مشاهده نسخه عملیاتی این پروژه می‌توانید به این صفحه (+) مراجعه کنید.

پروژه سیزدهم: ساخت اپلیکیشن TO-DO با جاوا اسکریپت

راهنمای پروژه محور جاوا اسکریپت

جاوا اسکریپت ابزاری شگفت‌انگیز برای ساخت یک اپلیکیشن TO-DO سفارشی محسوب می‌شود. کافی است پروژه را به صورت محدود آغاز کنید و صرفاً امکان افزودن و حذف برخی آیتم‌ها را به آن اضافه کنید.

به مرور که مهارت‌های شما بهبود می‌یابند، می‌توانید To-Do-های خود را به روش کارآمدتری مدیریت کنید. برای نمونه می‌توانید از لیست‌های چندگانه در کنار همدیگر برای دسته‌بندی آیتم‌های TO-DO بهره بگیرید. یک قابلیت بسیار مفید این است که امکان کشیدن و رها کردن را برای جابجایی بین لیست‌ها و ستون‌های مختلف فعال سازید. به این ترتیب وارد پروژه سیزدهم از آموزش جاوا اسکریپت پروژه محور می‌شویم.

  • فایل HTML کدنویسی اپلیکیشن TO-DO با جاوا اسکریپت
<!--PEN CODE-->
<div id="tasker" class="tasker">
	<div id="error" class="error">Please enter a task</div>
	<div id="tasker-header" class="tasker-header">
		<input type="text" id="input-task" placeholder="Enter a task">
		<button id="add-task-btn"><i class="fa fa-fw fa-plus"></i>
		</button>
	</div>
	<div class="tasker-body">
		<ul id="tasks"></ul>
	</div>
</div>
<!--END PEN CODE-->
  • فایل CSS توسعه اپلیکیشن TO-DO با جاوا اسکریپت
$primary: #313e50;
$grey: #cdcdcd;
$secondary: #1dd2af;

%reset {
	margin: 0;
	padding: 0;
	border: none;
	outline: none;
	background: transparent;
}

%transition {
	transition: all 0.2s ease;
	-webkit-transition: all 0.2s ease;
}

body {
	background: #f1f1f1;
	margin-top: 2rem;
}

/*PEN STYLES*/
.tasker {
	max-width: 400px;
	margin: 0 auto;
	.error {
		display: none;
		background: rgba(237, 28, 36, 0.7);
		color: #fff;
		padding: 14px;
		margin-bottom: 10px;
		border-radius: 5px;
		text-align: center;
	}

	ul {
		@extend %reset;
		background: #fff;
	}

	li,
	.error,
	button,
	input {
		@extend %reset;
		font: 18px/1.25em Helvetica, Arial, Sans-serif;
	}
}

.tasker-header {
	display: inline-flex;
	background: $primary;
	justify-content: space-between;
	width: 100%;
	input,
	button {
		color: #fff;
		box-sizing: border-box;
		font-size: 1.25em;
		padding: 14px;
	}

	input {
		flex-grow: 2;
	}

	button {
		@extend %transition;
		background: $secondary;
		border-left: 1px solid ($secondary * 1.05);
		&:hover {
			background: $secondary * 1.1;
		}
	}
}

.tasker-body {
	.task {
		display: block;
		position: relative;
		padding: 14px 40px 14px 14px;
		border-bottom: 1px solid rgba(0, 0, 0, 0.1);
		&:last-child {
			border-bottom: none;
		}

		&:hover > button {
			opacity: 1;
		}

		&.completed {
			color: $grey;
			text-decoration: line-through;
		}

		input {
			margin-right: 10px;
		}

		button {
			@extend %transition;
			color: $grey;
			margin: 14px;
			position: absolute;
			top: 0;
			right: 0;
			opacity: 0;
			&:hover {
				color: #ed1c24;
			}
		}
	}
}
  • فایل جاوا اسکریپت پروژه ساخت اپلیکیشن TO-DO با جاوا اسکریپت
(function() {
	'use strict';
	var tasker = {
		init: function() {
			this.cacheDom();
			this.bindEvents();
			this.evalTasklist();
		},
		cacheDom: function() {
			this.taskInput = document.getElementById("input-task");
			this.addBtn = document.getElementById("add-task-btn");
			this.tasklist = document.getElementById("tasks");
			this.tasklistChildren = this.tasklist.children;
			this.errorMessage = document.getElementById("error");
		},
		bindEvents: function() {
			this.addBtn.onclick = this.addTask.bind(this);
			this.taskInput.onkeypress = this.enterKey.bind(this);
		},
		evalTasklist: function() {
			var i, chkBox, delBtn;
			//BIND CLICK EVENTS TO ELEMENTS
			for (i = 0; i < this.tasklistChildren.length; i += 1) {
				//ADD CLICK EVENT TO CHECKBOXES
				chkBox = this.tasklistChildren[i].getElementsByTagName("input")[0];
				chkBox.onclick = this.completeTask.bind(this, this.tasklistChildren[i], chkBox);
				//ADD CLICK EVENT TO DELETE BUTTON
				delBtn = this.tasklistChildren[i].getElementsByTagName("button")[0];
				delBtn.onclick = this.delTask.bind(this, i);
			}
		},
		render: function() {
			var taskLi, taskChkbx, taskVal, taskBtn, taskTrsh;
			//BUILD HTML
			taskLi = document.createElement("li");
			taskLi.setAttribute("class", "task");
			//CHECKBOX
			taskChkbx = document.createElement("input");
			taskChkbx.setAttribute("type", "checkbox");
			//USER TASK
			taskVal = document.createTextNode(this.taskInput.value);
			//DELETE BUTTON
			taskBtn = document.createElement("button");
			//TRASH ICON
			taskTrsh = document.createElement("i");
			taskTrsh.setAttribute("class", "fa fa-trash");
			//INSTERT TRASH CAN INTO BUTTON
			taskBtn.appendChild(taskTrsh);

			//APPEND ELEMENTS TO TASKLI
			taskLi.appendChild(taskChkbx);
			taskLi.appendChild(taskVal);
			taskLi.appendChild(taskBtn);

			//ADD TASK TO TASK LIST
			this.tasklist.appendChild(taskLi);

		},
		completeTask: function(i, chkBox) {
			if (chkBox.checked) {
				i.className = "task completed";
			} else {
				this.incompleteTask(i);
			}
		},
		incompleteTask: function(i) {
			i.className = "task";
		},
		enterKey: function(event) {
			if (event.keyCode === 13 || event.which === 13) {
				this.addTask();
			}
		},
		addTask: function() {
			var value = this.taskInput.value;
			this.errorMessage.style.display = "none";

			if (value === "") {
				this.error();
			} else {
				this.render();
				this.taskInput.value = "";
				this.evalTasklist();
			}
		},
		delTask: function(i) {
			this.tasklist.children[i].remove();
			this.evalTasklist();
		},
		error: function() {
			this.errorMessage.style.display = "block";
		}
	};

	tasker.init();
}());

برای مشاهده نسخه نهایی این پروژه به این صفحه (+) مراجعه کنید.

پروژه چهاردهم: توسعه تایملاین جاوا اسکریپت

راهنمای پروژه محور جاوا اسکریپت

اگر می‌خواهید یک توسعه‌دهنده فرانت‌اند بشوید، می‌توانید کار خود را با ساخت یک تایملاین سفارشی جاوا اسکریپت آغاز کنید. برای نمونه این تایملاین می‌تواند یک قابلیت عالی برای وب‌سایت‌هایی مانند مشتری‌های فریلنس باشد. کسب و ‌کارها و استارتاپ‌ها عموماً از تایملاین برای نمایش مسیر پیشرفت خود و نقاط عطف در وب‌سایت‌هایشان بهره می‌گیرند.

ضمناً می‌توانید از کد تایملاین جاوا اسکریپت خود برای اپلیکیشن‌های مشابه بهره بگیرید. فرض کنید می‌خواهید مراحل مهم یک کار را به بخش‌های با اندازه کوچک برای بازدیدکنندگان وب‌سایت تقسیم کنید. به این منظور می‌توانید کد تایملاین را طوری تغییر دهید که بخش‌های کوچکی از یک داستان را به بازدیدکنندگان وب‌سایت نمایش دهد و به این ترتیب از سردرگم ساختن آن‌ها با اطلاعات بیش از حد جلوگیری کنید.

  • فایل HTML تایملاین جاوا اسکریپت
<section class="intro">
  <div class="container">
    <h1>Vertical Timeline &darr;</h1>
  </div>
</section>

<section class="timeline">
  <ul>
    <li>
      <div>
        <time>1934</time> At vero eos et accusamus et iusto odio dignissimos ducimus qui blanditiis praesentium At vero eos et accusamus et iusto odio dignissimos ducimus qui blanditiis praesentium
      </div>
    </li>
    <li>
      <div>
        <time>1937</time> Proin quam velit, efficitur vel neque vitae, rhoncus commodo mi. Suspendisse finibus mauris et bibendum molestie. Aenean ex augue, varius et pulvinar in, pretium non nisi.
      </div>
    </li>
    <li>
      <div>
        <time>1940</time> Proin iaculis, nibh eget efficitur varius, libero tellus porta dolor, at pulvinar tortor ex eget ligula. Integer eu dapibus arcu, sit amet sollicitudin eros.
      </div>
    </li>
    <li>
      <div>
        <time>1943</time> In mattis elit vitae odio posuere, nec maximus massa varius. Suspendisse varius volutpat mattis. Vestibulum id magna est.
      </div>
    </li>
    <li>
      <div>
        <time>1946</time> In mattis elit vitae odio posuere, nec maximus massa varius. Suspendisse varius volutpat mattis. Vestibulum id magna est.
      </div>
    </li>
    <li>
      <div>
        <time>1956</time> In mattis elit vitae odio posuere, nec maximus massa varius. Suspendisse varius volutpat mattis. Vestibulum id magna est.
      </div>
    </li>
    <li>
      <div>
        <time>1957</time> In mattis elit vitae odio posuere, nec maximus massa varius. Suspendisse varius volutpat mattis. Vestibulum id magna est.
      </div>
    </li>
    <li>
      <div>
        <time>1967</time> Aenean condimentum odio a bibendum rhoncus. Ut mauris felis, volutpat eget porta faucibus, euismod quis ante.
      </div>
    </li>
    <li>
      <div>
        <time>1977</time> Vestibulum porttitor lorem sed pharetra dignissim. Nulla maximus, dui a tristique iaculis, quam dolor convallis enim, non dignissim ligula ipsum a turpis.
      </div>
    </li>
    <li>
      <div>
        <time>1985</time> In mattis elit vitae odio posuere, nec maximus massa varius. Suspendisse varius volutpat mattis. Vestibulum id magna est.
      </div>
    </li>
    <li>
      <div>
        <time>2000</time> In mattis elit vitae odio posuere, nec maximus massa varius. Suspendisse varius volutpat mattis. Vestibulum id magna est.
      </div>
    </li>
    <li>
      <div>
        <time>2005</time> In mattis elit vitae odio posuere, nec maximus massa varius. Suspendisse varius volutpat mattis. Vestibulum id magna est.
      </div>
    </li>
  </ul>
</section>
  • فایل CSS ساخت تایملاین با جاوا اسکریپت
*,
*::before,
*::after {
  margin: 0;
  padding: 0;
  box-sizing: border-box;
}

body {
  font: normal 16px/1.5 "Helvetica Neue", sans-serif;
  background: #456990;
  color: #fff;
  overflow-x: hidden;
  padding-bottom: 50px;
}  /* INTRO SECTION
–––––––––––––––––––––––––––––––––––––––––––––––––– */

.intro {
  background: #F45B69;
  padding: 100px 0;
}

.container {
  width: 90%;
  max-width: 1200px;
  margin: 0 auto;
  text-align: center;
}

h1 {
  font-size: 2.5rem;
}


/* TIMELINE
–––––––––––––––––––––––––––––––––––––––––––––––––– */

.timeline ul {
  background: #456990;
  padding: 50px 0;
}

.timeline ul li {
  list-style-type: none;
  position: relative;
  width: 6px;
  margin: 0 auto;
  padding-top: 50px;
  background: #fff;
}

.timeline ul li::after {
  content: '';
  position: absolute;
  left: 50%;
  bottom: 0;
  transform: translateX(-50%);
  width: 30px;
  height: 30px;
  border-radius: 50%;
  background: inherit;
}

.timeline ul li div {
  position: relative;
  bottom: 0;
  width: 400px;
  padding: 15px;
  background: #F45B69;
}

.timeline ul li div::before {
  content: '';
  position: absolute;
  bottom: 7px;
  width: 0;
  height: 0;
  border-style: solid;
}

.timeline ul li:nth-child(odd) div {
  left: 45px;
}

.timeline ul li:nth-child(odd) div::before {
  left: -15px;
  border-width: 8px 16px 8px 0;
  border-color: transparent #F45B69 transparent transparent;
}

.timeline ul li:nth-child(even) div {
  left: -439px;
}

.timeline ul li:nth-child(even) div::before {
  right: -15px;
  border-width: 8px 0 8px 16px;
  border-color: transparent transparent transparent #F45B69;
}

time {
  display: block;
  font-size: 1.2rem;
  font-weight: bold;
  margin-bottom: 8px;
}


/* EFFECTS
–––––––––––––––––––––––––––––––––––––––––––––––––– */

.timeline ul li::after {
  transition: background .5s ease-in-out;
}

.timeline ul li.in-view::after {
  background: #F45B69;
}

.timeline ul li div {
  visibility: hidden;
  opacity: 0;
  transition: all .5s ease-in-out;
}

.timeline ul li:nth-child(odd) div {
  transform: translate3d(200px, 0, 0);
}

.timeline ul li:nth-child(even) div {
  transform: translate3d(-200px, 0, 0);
}

.timeline ul li.in-view div {
  transform: none;
  visibility: visible;
  opacity: 1;
}


/* GENERAL MEDIA QUERIES
–––––––––––––––––––––––––––––––––––––––––––––––––– */

@media screen and (max-width: 900px) {
  .timeline ul li div {
    width: 250px;
  }
  .timeline ul li:nth-child(even) div {
    left: -289px;
    /*250+45-6*/
  }
}

@media screen and (max-width: 600px) {
  .timeline ul li {
    margin-left: 20px;
  }
  .timeline ul li div {
    width: calc(100vw - 91px);
  }
  .timeline ul li:nth-child(even) div {
    left: 45px;
  }
  .timeline ul li:nth-child(even) div::before {
    left: -15px;
    border-width: 8px 16px 8px 0;
    border-color: transparent #F45B69 transparent transparent;
  }
}
  • فایل جاوا اسکریپت پروژه توسعه تایملاین با جاوا اسکریپت
(function() {

  'use strict';

  // define variables
  var items = document.querySelectorAll(".timeline li");

  // check if an element is in viewport
  // http://stackoverflow.com/questions/123999/how-to-tell-if-a-dom-element-is-visible-in-the-current-viewport
  function isElementInViewport(el) {
    var rect = el.getBoundingClientRect();
    return (
      rect.top >= 0 &&
      rect.left >= 0 &&
      rect.bottom <= (window.innerHeight || document.documentElement.clientHeight) &&
      rect.right <= (window.innerWidth || document.documentElement.clientWidth)
    );
  }

  function callbackFunc() {
    for (var i = 0; i < items.length; i++) {
      if (isElementInViewport(items[i])) {
        items[i].classList.add("in-view");
      }
    }
  }

  // listen for events
  window.addEventListener("load", callbackFunc);
  window.addEventListener("resize", callbackFunc);
  window.addEventListener("scroll", callbackFunc);

})();

برای مشاهده نسخه عملیاتی این پروژه به این صفحه (+) مراجعه کنید.

پروژه پانزدهم: ساخت یک اپلیکیشن آزمون با جاوا اسکریپت

راهنمای پروژه محور جاوا اسکریپت

همه افراد از یک آزمون خوب لذت می‌برند. ساخت یک اپلیکیشن کوچک آزمون با استفاده از جاوا اسکریپت کار آسانی محسوب می‌شود و می‌تواند کمک بزرگی در مسیر یادگیری این زبان باشد.

اگر می‌خواهید از راه فریلنسری کسب درآمد بکنید، می‌توانید یک وب‌سایت پورتفولیو بسازید که پروژه‌هایتان را نمایش می‌دهد. همچنین از یک آزمون در سایت استفاده کنید تا مشتری‌های بالقوه بتوانند سرویس‌های مناسب خود را پیدا کنند.

همچنین اگر یک بلاگ در مورد برنامه‌نویسی داشته باشید، می‌توانید به خوانندگان خود در یافتن منابع مناسب برای آموزش کمک کنید. به این منظور کافی است یک آزمون کوچک ایجاد کنید تا اهداف و مسیر افراد را از طریق آن‌ها مشخص ساخته و راهنماها و نوشته‌های مناسب را در اختیار ایشان قرار دهید.

  • فایل HTML توسعه اپلیکیشن آزمون با جاوا اسکریپت
<!DOCTYPE html>
<html>
	<head>
		<title>Dynamic Quiz Project</title>
		<link type='text/css' rel='stylesheet' href='stylesheet.css'/>
		<link rel="stylesheet" type="text/css" href="https://fonts.googleapis.com/css?family=Open Sans"/>
	</head>
	<body>
		<div id='container'>
			<div id='title'>
				<h1>Learning Js Properly: Project #1 - Dynamic Quiz</h1>
			</div>
   			<br/>
  			<div id='quiz'></div>
    		<div class='button' id='next'><a href='#'>Next</a></div>
    		<div class='button' id='prev'><a href='#'>Prev</a></div>
    		<div class='button' id='start'> <a href='#'>Start Over</a></div>
    		<!-- <button class='' id='next'>Next</a></button>
    		<button class='' id='prev'>Prev</a></button>
    		<button class='' id='start'> Start Over</a></button> -->
    	</div>

		<script type='text/javascript' src='https://ajax.googleapis.com/ajax/libs/jquery/1.9.1/jquery.min.js'></script>
		<script type="text/javascript" src='questions.json'></script>
		<script type='text/javascript' src='jsquiz.js'></script>
	</body>
</html>
  • فایل CSS توسعه اپلیکیشن آزمون با جاوا اسکریپت
body {
    font-family: Open Sans;
}

h1 {
    text-align: center;
}

#title {
    text-decoration: underline;
}

#quiz {
    text-indent: 10px;
    display:none;
}

.button {
    border:4px solid;
    border-radius:5px;
    width: 40px;
    padding-left:5px;
    padding-right: 5px;
    position: relative;
    float:right;
    background-color: #DCDCDC;
    color: black;
    margin: 0 2px 0 2px;
}

.button.active {
    background-color: #F8F8FF;
    color: #525252;
}

button {
    position: relative;
    float:right;
}

.button a {
    text-decoration: none;
    color: black;
}

#container {
    width:50%;
    margin:auto;
    padding: 0 25px 40px 10px;
    background-color: #1E90FF;
    border:4px solid #B0E0E6;
    border-radius:5px;
    color: #FFFFFF;
    font-weight: bold;
    box-shadow: 5px 5px 5px #888;
}

ul {
    list-style-type: none;
    padding: 0;
    margin: 0;
}

#prev {
    display:none;
}

#start {
    display:none;
    width: 90px;
}
  • فایل جاوا اسکریپت پروژه ساخت اپلیکیشن آزمون با جاوا اسکریپت
(function() {
  var questions = [{
    question: "What is 2*5?",
    choices: [2, 5, 10, 15, 20],
    correctAnswer: 2
  }, {
    question: "What is 3*6?",
    choices: [3, 6, 9, 12, 18],
    correctAnswer: 4
  }, {
    question: "What is 8*9?",
    choices: [72, 99, 108, 134, 156],
    correctAnswer: 0
  }, {
    question: "What is 1*7?",
    choices: [4, 5, 6, 7, 8],
    correctAnswer: 3
  }, {
    question: "What is 8*8?",
    choices: [20, 30, 40, 50, 64],
    correctAnswer: 4
  }];
  
  var questionCounter = 0; //Tracks question number
  var selections = []; //Array containing user choices
  var quiz = $('#quiz'); //Quiz div object
  
  // Display initial question
  displayNext();
  
  // Click handler for the 'next' button
  $('#next').on('click', function (e) {
    e.preventDefault();
    
    // Suspend click listener during fade animation
    if(quiz.is(':animated')) {        
      return false;
    }
    choose();
    
    // If no user selection, progress is stopped
    if (isNaN(selections[questionCounter])) {
      alert('Please make a selection!');
    } else {
      questionCounter++;
      displayNext();
    }
  });
  
  // Click handler for the 'prev' button
  $('#prev').on('click', function (e) {
    e.preventDefault();
    
    if(quiz.is(':animated')) {
      return false;
    }
    choose();
    questionCounter--;
    displayNext();
  });
  
  // Click handler for the 'Start Over' button
  $('#start').on('click', function (e) {
    e.preventDefault();
    
    if(quiz.is(':animated')) {
      return false;
    }
    questionCounter = 0;
    selections = [];
    displayNext();
    $('#start').hide();
  });
  
  // Animates buttons on hover
  $('.button').on('mouseenter', function () {
    $(this).addClass('active');
  });
  $('.button').on('mouseleave', function () {
    $(this).removeClass('active');
  });
  
  // Creates and returns the div that contains the questions and 
  // the answer selections
  function createQuestionElement(index) {
    var qElement = $('<div>', {
      id: 'question'
    });
    
    var header = $('<h2>Question ' + (index + 1) + ':</h2>');
    qElement.append(header);
    
    var question = $('<p>').append(questions[index].question);
    qElement.append(question);
    
    var radioButtons = createRadios(index);
    qElement.append(radioButtons);
    
    return qElement;
  }
  
  // Creates a list of the answer choices as radio inputs
  function createRadios(index) {
    var radioList = $('<ul>');
    var item;
    var input = '';
    for (var i = 0; i < questions[index].choices.length; i++) {
      item = $('<li>');
      input = '<input type="radio" name="answer" value=' + i + ' />';
      input += questions[index].choices[i];
      item.append(input);
      radioList.append(item);
    }
    return radioList;
  }
  
  // Reads the user selection and pushes the value to an array
  function choose() {
    selections[questionCounter] = +$('input[name="answer"]:checked').val();
  }
  
  // Displays next requested element
  function displayNext() {
    quiz.fadeOut(function() {
      $('#question').remove();
      
      if(questionCounter < questions.length){
        var nextQuestion = createQuestionElement(questionCounter);
        quiz.append(nextQuestion).fadeIn();
        if (!(isNaN(selections[questionCounter]))) {
          $('input[value='+selections[questionCounter]+']').prop('checked', true);
        }
        
        // Controls display of 'prev' button
        if(questionCounter === 1){
          $('#prev').show();
        } else if(questionCounter === 0){
          
          $('#prev').hide();
          $('#next').show();
        }
      }else {
        var scoreElem = displayScore();
        quiz.append(scoreElem).fadeIn();
        $('#next').hide();
        $('#prev').hide();
        $('#start').show();
      }
    });
  }
  
  // Computes score and returns a paragraph element to be displayed
  function displayScore() {
    var score = $('<p>',{id: 'question'});
    
    var numCorrect = 0;
    for (var i = 0; i < selections.length; i++) {
      if (selections[i] === questions[i].correctAnswer) {
        numCorrect++;
      }
    }
    
    score.append('You got ' + numCorrect + ' questions out of ' +
                 questions.length + ' right!!!');
    return score;
  }
})();

سخن پایانی

اگر می‌خواهید مسیر شغلی خود را به عنوان یک توسعه‌دهنده وب آغاز کنید، ‌بهترین کار برای یادگیری خوب زبان جاوا اسکریپت، ساخت پروژه‌های کوچک است. کار کردن روی پروژه‌های شخصی موجب می‌شود که درکی از طرز کار ساختار این زبان پیدا کنید و بتوانید مسائل مختلف را با آن حل کنید.

زمانی که شروع به یادگیری جاوا اسکریپت می‌کنید و نخستین پروژه سطح مبتدی خود را به پایان می‌برید، به میزان زیادی اعتماد به نفستان برای کار کردن به صورت مستقل افزایش می‌یابد. همچنین ایده‌های سرگرم‌کننده زیادی برای ادامه مسیر یادگیری پیدا می‌کنید. به این ترتیب آموزش جاوا اسکریپت پروژه محور را به پایان می‌بریم اما می‌تونید در مجله فرادرس مقالات و آموزش‌های مرتبط متعددی را در رابطه با این زبان برنامه‌نویسی مطالعه کنید.

بر اساس رای ۱۸ نفر
آیا این مطلب برای شما مفید بود؟
شما قبلا رای داده‌اید!
اگر بازخوردی درباره این مطلب دارید یا پرسشی دارید که بدون پاسخ مانده است، آن را از طریق بخش نظرات مطرح کنید.
منابع:
tutorialspoint mikkegoes
۲ thoughts on “آموزش جاوا اسکریپت پروژه محور | ۱۵ پروژه عملی و کاربردی

خیلی عالی بودن
دمت گرم

نظر شما چیست؟

نشانی ایمیل شما منتشر نخواهد شد. بخش‌های موردنیاز علامت‌گذاری شده‌اند *